
Interior Project Frankenstein
 07-24-2016, 09:31 PM
#1
Registered User

Thread Starter

Join Date: Sep 2008
Posts: 35
Likes: 0
Received 0 Likes
on
0 Posts
Interior Project Frankenstein
Hey all.
So as you can see my seats have seen some better days. They clearly haven't been taken care of. Lol

Below you will see steps that I took to fix my seat. All these steps are just something I did. I am not a professional. I am not saying this is the only way to do this. If you decided to follow, you are doing so at your own risk and I will not be help liable for damages that you did.
Thank you.
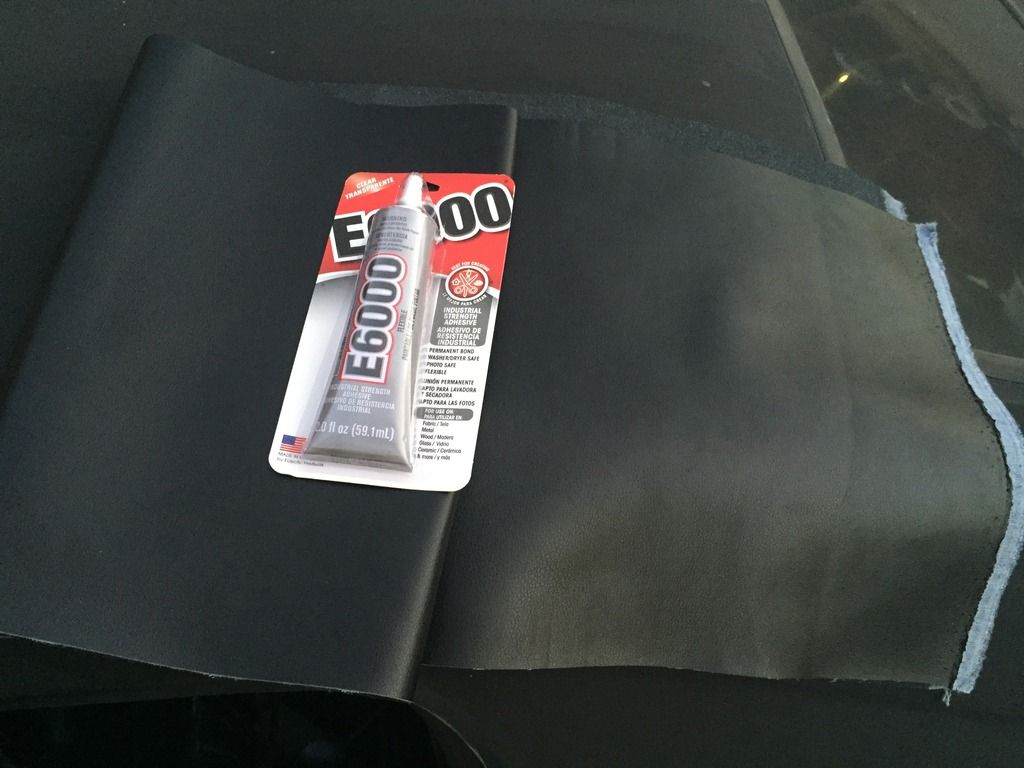
So I picked up some leather fabric from a local fabric store and some e6000 fabric glue. Total here I spent $8 (was $16 but had 50% coupon) the amount of fabric I got is enough to do both seat though. And the glue is only enough to do 1 seat. Lol
I have never taken my seats out before so I did some searching. Found on the ap2 you have the 4 bolts (14mm,12mm) on the bottom and 2 electronic sensors you need to disconnect. Along with the seat belt from the little holder at the shoulder.
This would be much easier with the top down or off. But I didn't have a helper to remove my hardtop.
I read that people scratch the interior trying to get the seat out so took care to watch what I was doing take it out. I ended up having the seat pulled mostly forward and then lifted it up. Turned the front towards the door opening and walked it out ass part first( with the back being horizontal to the ground). People said the seats are heavy (honestly it weights about as much as my kids car seats)

I did some ruff eyeball measuring and cutting and came up with these

Made the big enough to overlap each other for more support

I started at the back and glue them overlapping moving forward.
Here I found it easier to put the piece into position. Get it how I wanted then glue half of it down then work on the other half. I glued all around underneath and after making slight adjustments to make sure it's how I wanted it I went on to the next section. After all sections got completed it then took care to glue all the edges and corners.

I took the front part down almost all the way because of the tears making there way around the front. I made a slit in the middle so that it would sit flat.
The glue has already dried and it looks the same as when it is wet. Clear and shiny.

And here it is. Frank's new face!!
The patches where just for support. lol


Got it all tightened up and here it is!!!


It goes all the way around the back of the top and connects via Velcro. And the bottom connects with straps and buckles.
The black piece at the bottom is their "gun tote".
Gun tote as seen here. Lol

Will see how it feels once it's back in the car.
Here are some other pics of it (on some more roomy vehicles)


The photos look purple but they are blue to match My LBP s
Thanks for looking!
Hey all.
So as you can see my seats have seen some better days. They clearly haven't been taken care of. Lol

Below you will see steps that I took to fix my seat. All these steps are just something I did. I am not a professional. I am not saying this is the only way to do this. If you decided to follow, you are doing so at your own risk and I will not be help liable for damages that you did.
Thank you.
So I picked up some leather fabric from a local fabric store and some e6000 fabric glue. Total here I spent $8 (was $16 but had 50% coupon) the amount of fabric I got is enough to do both seat though. And the glue is only enough to do 1 seat. Lol

I have never taken my seats out before so I did some searching. Found on the ap2 you have the 4 bolts (14mm,12mm) on the bottom and 2 electronic sensors you need to disconnect. Along with the seat belt from the little holder at the shoulder.
This would be much easier with the top down or off. But I didn't have a helper to remove my hardtop.
I read that people scratch the interior trying to get the seat out so took care to watch what I was doing take it out. I ended up having the seat pulled mostly forward and then lifted it up. Turned the front towards the door opening and walked it out ass part first( with the back being horizontal to the ground). People said the seats are heavy (honestly it weights about as much as my kids car seats)

I did some ruff eyeball measuring and cutting and came up with these

Made the big enough to overlap each other for more support

I started at the back and glue them overlapping moving forward.
Here I found it easier to put the piece into position. Get it how I wanted then glue half of it down then work on the other half. I glued all around underneath and after making slight adjustments to make sure it's how I wanted it I went on to the next section. After all sections got completed it then took care to glue all the edges and corners.

I took the front part down almost all the way because of the tears making there way around the front. I made a slit in the middle so that it would sit flat.
The glue has already dried and it looks the same as when it is wet. Clear and shiny.

And here it is. Frank's new face!!
The patches where just for support. lol


Got it all tightened up and here it is!!!


It goes all the way around the back of the top and connects via Velcro. And the bottom connects with straps and buckles.
The black piece at the bottom is their "gun tote".
Gun tote as seen here. Lol

Will see how it feels once it's back in the car.
Here are some other pics of it (on some more roomy vehicles)


The photos look purple but they are blue to match My LBP s
Thanks for looking!
 07-25-2016, 07:01 PM
#2


Cool beans. That gun tote is a good idea.
 07-26-2016, 09:25 AM
#4
Registered User
Thread Starter
Join Date: Sep 2008
Posts: 35
Likes: 0
Received 0 Likes
on
0 Posts
07-26-2016, 09:27 AM
#5
Registered User
Thread Starter
Join Date: Sep 2008
Posts: 35
Likes: 0
Received 0 Likes
on
0 Posts


Trending Topics
07-26-2016, 01:33 PM
#8
Registered User
Thread Starter
Join Date: Sep 2008
Posts: 35
Likes: 0
Received 0 Likes
on
0 Posts
 07-29-2016, 03:56 PM
#9
Registered User
Thread Starter
Join Date: Sep 2008
Posts: 35
Likes: 0
Received 0 Likes
on
0 Posts
So have driven several days now in the car.
-covers make you sit a little higher
-covers don't get hot any more then the leather
-I don't really move in the seat at all now. Around corners and such I'm planted in the seat
Any other specific questions you guys have?
-covers make you sit a little higher
-covers don't get hot any more then the leather
-I don't really move in the seat at all now. Around corners and such I'm planted in the seat
Any other specific questions you guys have?

Thread
Thread Starter
Forum
Replies
Last Post
6spdap1
Member S2000 Classifieds and For Sale
0
10-24-2014 02:24 PM
6spdap1
Member S2000 Classifieds and For Sale
0
10-24-2014 02:23 PM