
DIY on removing Stong chips
 05-05-2013, 01:46 PM
#1
Registered User
Thread Starter
Join Date: Nov 2012
Location: Edinburgh
Posts: 662
Likes: 0
Received 0 Likes
on
0 Posts
well here it is hope it helps
Stone chip Diy solution without respray and without costing the earth. My trade secrete.
As you can see from the test section it did come up rather well.
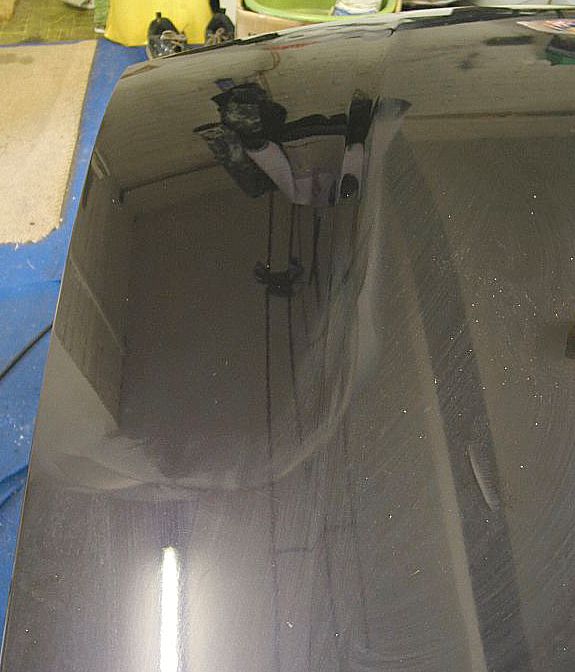
So well in fact it showed up the multitude of stone chips.
So I thought I would explain how I plan on making these less noticeable. I have used this technique before with some success.
Items required: A can or two of lighter fuel, small tub of matching or similar colour paint (Humbrol enamel paints are ideal - I used black), polishing pad (ideally lint free), protective gloves.
1. Wipe surface over with a cleaner - I use lighter fuel.
2. Squirt lighter fuel on to pad and add some paint.
3. Apply paint on to surface ensuring it is well rubbed in to the chips.
4. Leave for half an hour and repeat the procedure at least three times till the chips appear 'full'.
5. For large stone chips get a toothpick and dip in the paint and apply to hole.
6. Leave for a few days for the paint to dry.
6. Using 3000 grit wet and dry rub over the entire surface, taking particualr care with the larger toothpick filled stone chips.
7. Machine polish and finish with a wax.
This will get rid of 80-90 percent of pinholes.
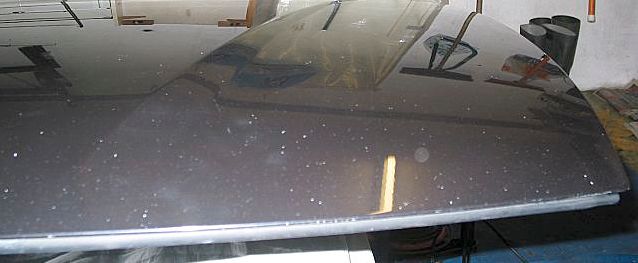
I have given the bonnet a couple of coats.
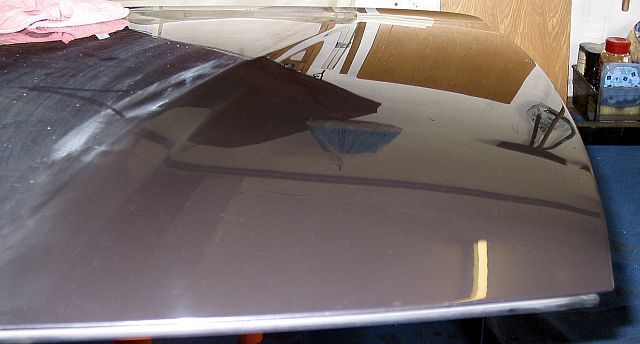
Original photo for comparison
I know it may look a bit frightening but a steady nerve and taking time will reap rewards. As explained it will reduce thee appearance of chips rather than remove them completely. Anyway another coat or two and then I will leave it for a while for the paint to harden.
For wet sanding I use an old cork block - don't try it without some sort of block, ideally something not too hard such as rubber. Use plenty of soapy water as a lubricant and do a small area at a time, keeping the strokes in the same directions. As I don't have a paint depth meter I made sure I didn't take too much off - a way to check is when you have finshed, wipe the panel and leave to dry. The entire panel should have a flat dull finish.
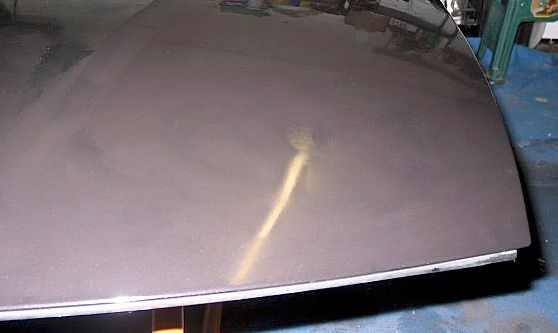
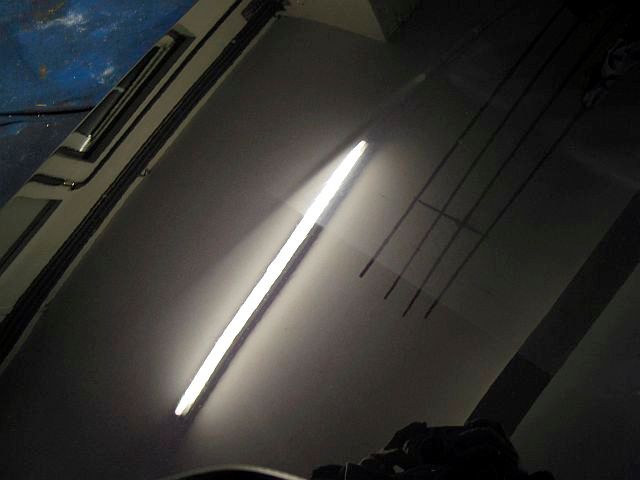
Here is a shot showing the dull flat sanding finish along with a section showing a first pass with Farcela.
Here is the bonnet after a test section using Farcela Scratch paste on a rotary. You may find there are a few pin holes that may have been missed, so use a toothpick and paint to fill them.
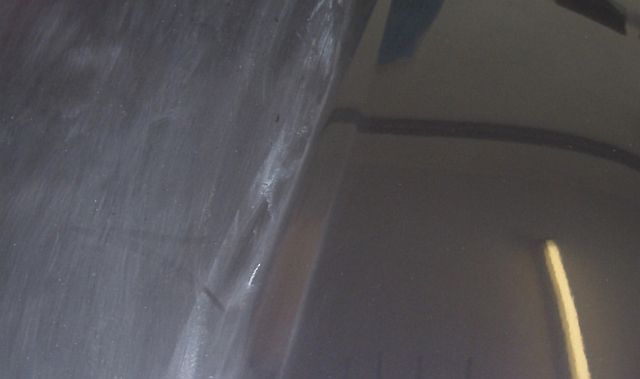
It will then have some Menzerna Final Finish - test section shown here:
....and will be followed with a a cleaner and wax.
Almost complete.
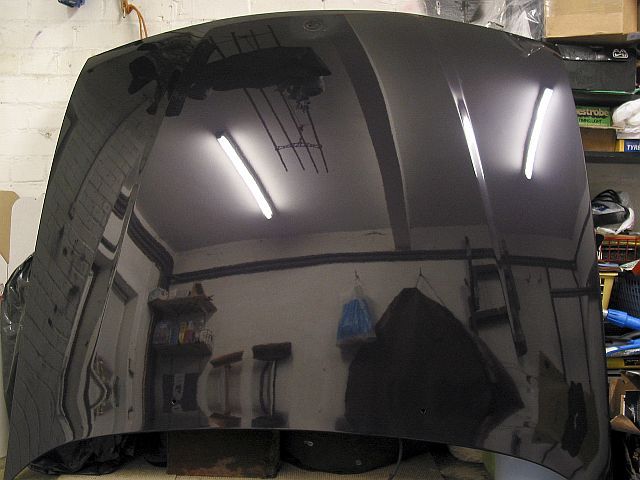
Bonnet has not been waxed at this stage. 8-)
8-)
Hope this helps.
Stone chip Diy solution without respray and without costing the earth. My trade secrete.
As you can see from the test section it did come up rather well.

So well in fact it showed up the multitude of stone chips.

So I thought I would explain how I plan on making these less noticeable. I have used this technique before with some success.
Items required: A can or two of lighter fuel, small tub of matching or similar colour paint (Humbrol enamel paints are ideal - I used black), polishing pad (ideally lint free), protective gloves.
1. Wipe surface over with a cleaner - I use lighter fuel.
2. Squirt lighter fuel on to pad and add some paint.
3. Apply paint on to surface ensuring it is well rubbed in to the chips.
4. Leave for half an hour and repeat the procedure at least three times till the chips appear 'full'.
5. For large stone chips get a toothpick and dip in the paint and apply to hole.
6. Leave for a few days for the paint to dry.
6. Using 3000 grit wet and dry rub over the entire surface, taking particualr care with the larger toothpick filled stone chips.
7. Machine polish and finish with a wax.
This will get rid of 80-90 percent of pinholes.
I have given the bonnet a couple of coats.

Original photo for comparison
I know it may look a bit frightening but a steady nerve and taking time will reap rewards. As explained it will reduce thee appearance of chips rather than remove them completely. Anyway another coat or two and then I will leave it for a while for the paint to harden.
For wet sanding I use an old cork block - don't try it without some sort of block, ideally something not too hard such as rubber. Use plenty of soapy water as a lubricant and do a small area at a time, keeping the strokes in the same directions. As I don't have a paint depth meter I made sure I didn't take too much off - a way to check is when you have finshed, wipe the panel and leave to dry. The entire panel should have a flat dull finish.
Here is a shot showing the dull flat sanding finish along with a section showing a first pass with Farcela.

Here is the bonnet after a test section using Farcela Scratch paste on a rotary. You may find there are a few pin holes that may have been missed, so use a toothpick and paint to fill them.

It will then have some Menzerna Final Finish - test section shown here:

....and will be followed with a a cleaner and wax.
Almost complete.

Bonnet has not been waxed at this stage.
8-)Hope this helps.

 05-06-2013, 06:39 AM
#5
Registered User
Thread Starter
Join Date: Nov 2012
Location: Edinburgh
Posts: 662
Likes: 0
Received 0 Likes
on
0 Posts
steady nerve is key 
most people think its the paint there sanding but in fact its the clearcoat is getting flatted and brought back to a clear flat finish.
worth giving it a try as a respray would cost a 10x as much
most people think its the paint there sanding but in fact its the clearcoat is getting flatted and brought back to a clear flat finish.
worth giving it a try as a respray would cost a 10x as much
05-06-2013, 12:07 PM
#7
Registered User
Thread Starter
Join Date: Nov 2012
Location: Edinburgh
Posts: 662
Likes: 0
Received 0 Likes
on
0 Posts
I use meguiars unigrit, really great stuff nice even sanding, id recommend getting the sanding block or a cork block is also good,
Here you go mate start at 2000 and then 2500 and finish with 3000 ready for machining its called wet sanding also works wounders for orange peal
http://www.cleanyourcar.co.uk/index....&productId=299
Here you go mate start at 2000 and then 2500 and finish with 3000 ready for machining its called wet sanding also works wounders for orange peal
http://www.cleanyourcar.co.uk/index....&productId=299
Trending Topics
05-06-2013, 01:27 PM
#8
Registered User

Join Date: Aug 2008
Posts: 487
Likes: 0
Received 0 Likes
on
0 Posts
I use meguiars unigrit, really great stuff nice even sanding, id recommend getting the sanding block or a cork block is also good,
Here you go mate start at 2000 and then 2500 and finish with 3000 ready for machining its called wet sanding also works wounders for orange peal
http://www.cleanyourcar.co.uk/index....&productId=299
Here you go mate start at 2000 and then 2500 and finish with 3000 ready for machining its called wet sanding also works wounders for orange peal
http://www.cleanyourcar.co.uk/index....&productId=299
 05-07-2013, 12:30 PM
#10
Registered User
Thread Starter
Join Date: Nov 2012
Location: Edinburgh
Posts: 662
Likes: 0
Received 0 Likes
on
0 Posts
No problems mate glad i could help you out
Who is planning on doing this ? If your a little scared get yourself to the scrappies and buy a practice panel which has stone chips on it, and add a scratch so you can practice on the scratch as well
Who is planning on doing this ? If your a little scared get yourself to the scrappies and buy a practice panel which has stone chips on it, and add a scratch so you can practice on the scratch as well