
I did my calipers...
 08-06-2007, 07:43 PM
#1


Thread Starter

Join Date: Jun 2006
Location: Cincinnati, OH
Posts: 6,041
Likes: 0
Received 0 Likes
on
0 Posts
Cross post from the Gallery, so shoot me. SMOG is my home, lol.
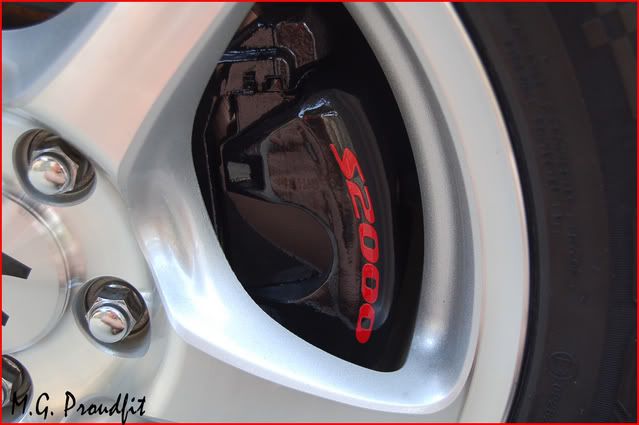
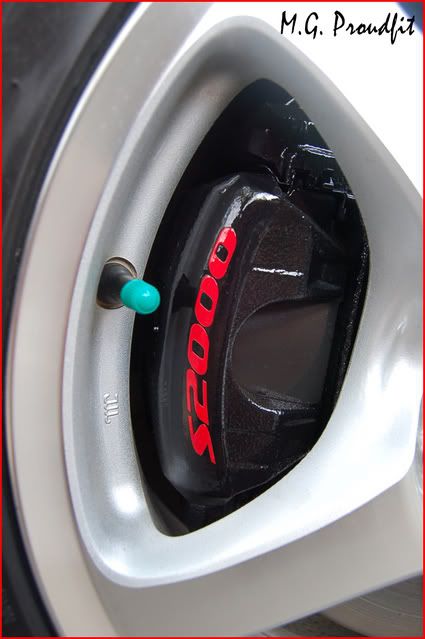
Hey y'all, I just did the calipers on the S this past weekend and just now got around to putting up pics. I dremeled down as much of the caliper as I could fits all the bits into. This is a strenuous process, especially if you keep the calipers on the car, as I did. I used the metal carbide grinding plate first, then followed that up with 3 different grits of sanding bits. Finished it off with 220, and then 400 grit sandpaper. It was so shiny when I was done, I couldnt believe it. I then used Duplicolor High-Temp Engine Enamel in Gloss Black, and did 5 coats of color. I let it dry for about 2 hours, then applied the decal, and then cleared 5 times shortly thereafter. I think they turned out great, especially better than how they look stock with the nasty casting marks. Here ya go:
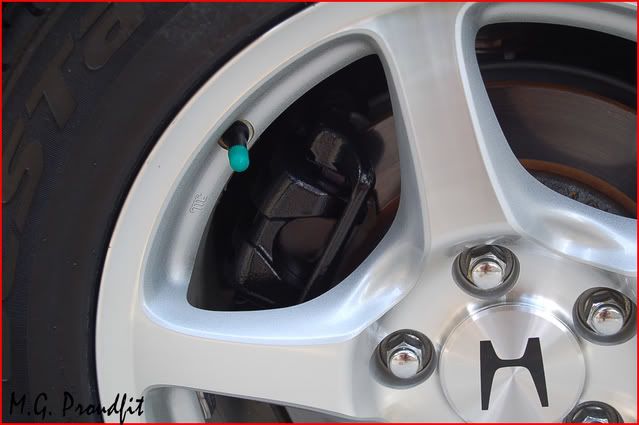
The rears I didnt sand down as much (barely at all actually, but I did clean them well. I used the same painting process, with less clear).
What'cha think?
-Matt
Hey y'all, I just did the calipers on the S this past weekend and just now got around to putting up pics. I dremeled down as much of the caliper as I could fits all the bits into. This is a strenuous process, especially if you keep the calipers on the car, as I did. I used the metal carbide grinding plate first, then followed that up with 3 different grits of sanding bits. Finished it off with 220, and then 400 grit sandpaper. It was so shiny when I was done, I couldnt believe it. I then used Duplicolor High-Temp Engine Enamel in Gloss Black, and did 5 coats of color. I let it dry for about 2 hours, then applied the decal, and then cleared 5 times shortly thereafter. I think they turned out great, especially better than how they look stock with the nasty casting marks. Here ya go:
The rears I didnt sand down as much (barely at all actually, but I did clean them well. I used the same painting process, with less clear).
What'cha think?
-Matt
 08-06-2007, 08:59 PM
#2
Registered User

Join Date: Jan 2007
Location: Knoxville Area
Posts: 1,724
Likes: 0
Received 0 Likes
on
0 Posts
Very nice!  I completely ground mine and I it took a couple days. I don't think I would do it agian, way to much work. I think I'd pay someone to do it. If it ever gets messed up or I decied to go with another color I'm going to take them off and have them powder coated.
I completely ground mine and I it took a couple days. I don't think I would do it agian, way to much work. I think I'd pay someone to do it. If it ever gets messed up or I decied to go with another color I'm going to take them off and have them powder coated.
08-06-2007, 09:02 PM
#3
Thread Starter
Join Date: Jun 2006
Location: Cincinnati, OH
Posts: 6,041
Likes: 0
Received 0 Likes
on
0 Posts
Got any pics of yours? I wanted to take mine off and spend forever on them, but I didnt want to mess with taking them off (contradiction, I know). I think they turned out well. Sure as heck took me long enough, @ 9.5 hours.
-Matt
-Matt
08-06-2007, 09:25 PM
#4
Registered User
Join Date: Jan 2007
Location: Knoxville Area
Posts: 1,724
Likes: 0
Received 0 Likes
on
0 Posts
Let me see if I can find any photos. I ground them on the car, but went to great lengths to get every little pit and cast mark out of it. Especially the front It took me 2 full days to do it. You should have seen the metal dust I swept up off the floor when I was done. I finished up the night before our last mod day and put the wheels on that morning. Got in a hurry and scratched a place on one of them... DOH! I have yet to touch it back up.
08-06-2007, 09:43 PM
#5
Registered User
Join Date: Jan 2007
Location: Knoxville Area
Posts: 1,724
Likes: 0
Received 0 Likes
on
0 Posts
No photos atm. I just now tried taking some in the garage but its to dark, with the flash it just washes the photo out. I'll try to get some tomarrow. I used the kit, which is a brush on. So all that prep work doesn't look as good as it could with tiny brush marks. Thats why I think it would be better to powder coat. I just don't know how to remove them and put them back on. Mines silver btw. Any color is better than that greenish gray coating they have on them stock.

 I dont know how I didnt think of that.