
DIY: HID Bulb Replacement Guide
 03-13-2013, 04:09 AM
#1

Hey guys, I'm not sure if there's a guide here already to replace HID bulbs. I couldn't find one so I decided to snap a few pictures today when I replaced mine with 6000k bulbs. Hopefully this guide will be useful to someone out there! Anyway...
What you'll need (for the way I did it!)
1. Jack/ 2 jack stands
2. Torque wrench/lug nut socket (for wheels)
3. 10mm socket/ratchet (to disconnect battery and remove 10mm screws on bumper)
4. small flat-head screwdriver (to remove inner fender liner clips and the T25 security screw)
5. T25 Security bit (optional)
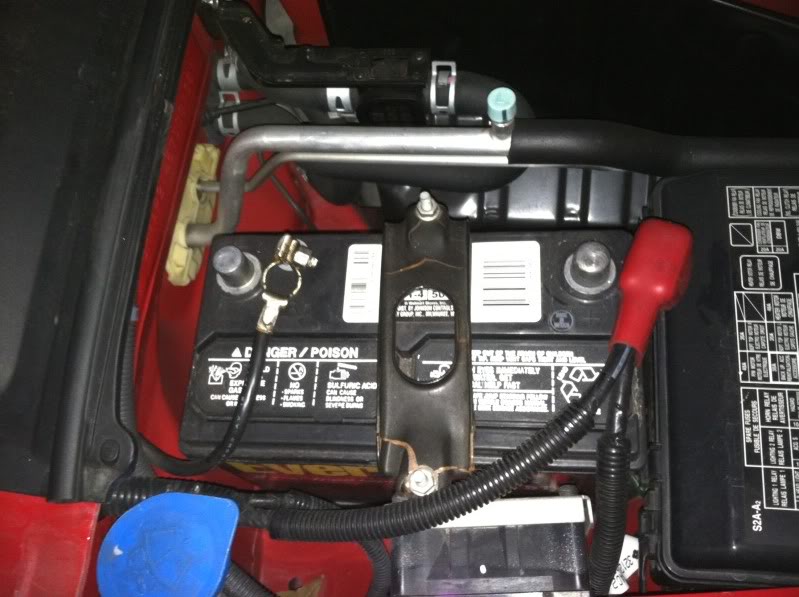
Step 1. Disconnect battery.
Step 2. Lift car and secure with jack stands
Step 3. Remove front wheels
Step 4. Remove fender liner clips and 10mm screws that retain the fender liner to the front bumper. These screws are found under the front bumper.
Step 5. Carefully pull away the fender liner, make sure you have plenty of room to work with! (makes things a lot less stressful)

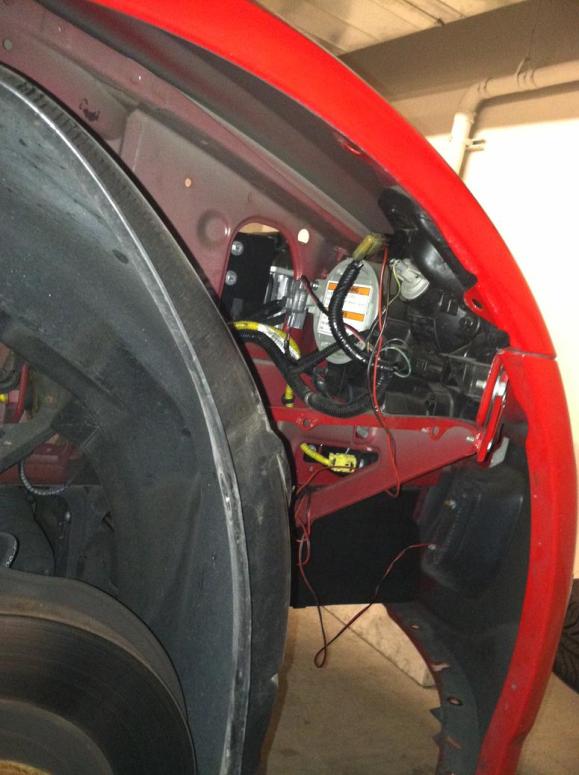
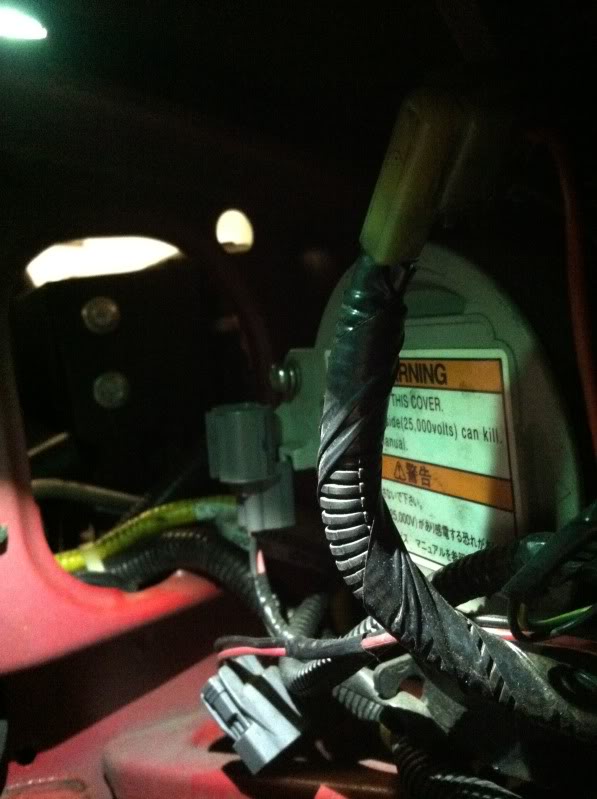
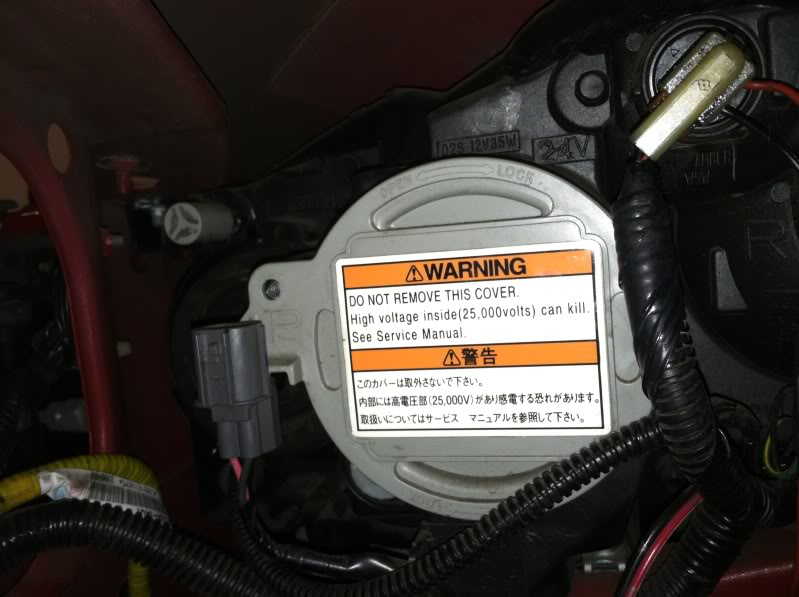
Step 6. Disconnect ballast connector by pressing tab and pushing the top half of connector up. (it helps to wedge a flat-head between the tab and nub)

Ta-da it's off!
Step 7. Remove security screw. The screw is a Torx T25 security screw. You do not need a T25 security bit to remove this. I used a small flat head screw driver, like so.
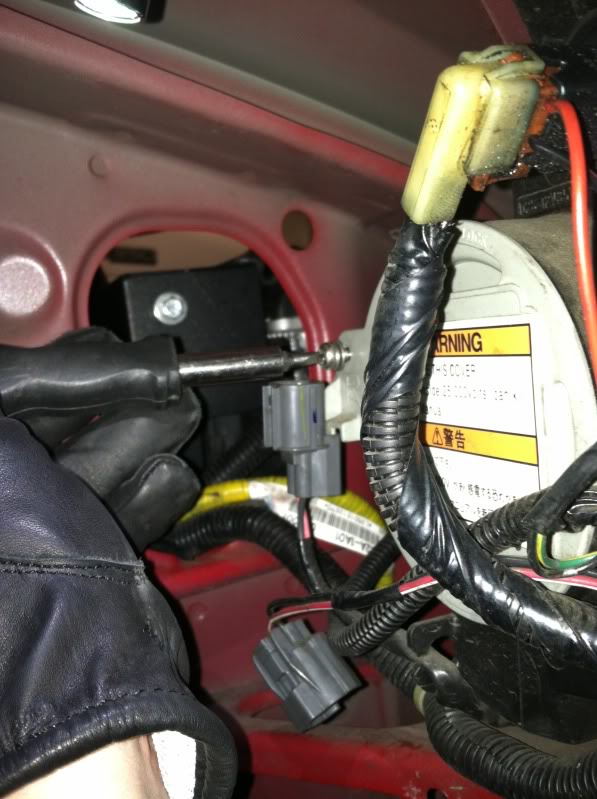
This is what the screw looks like. Notice the security pin in the middle, you'd need a Torx T25 bit that has a hole in the middle to remove this. Otherwise use a flat head screw driver.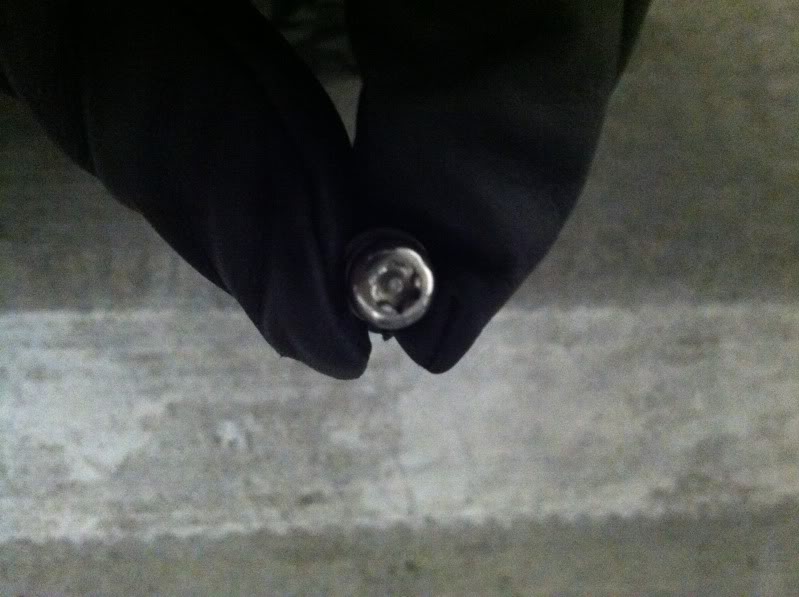
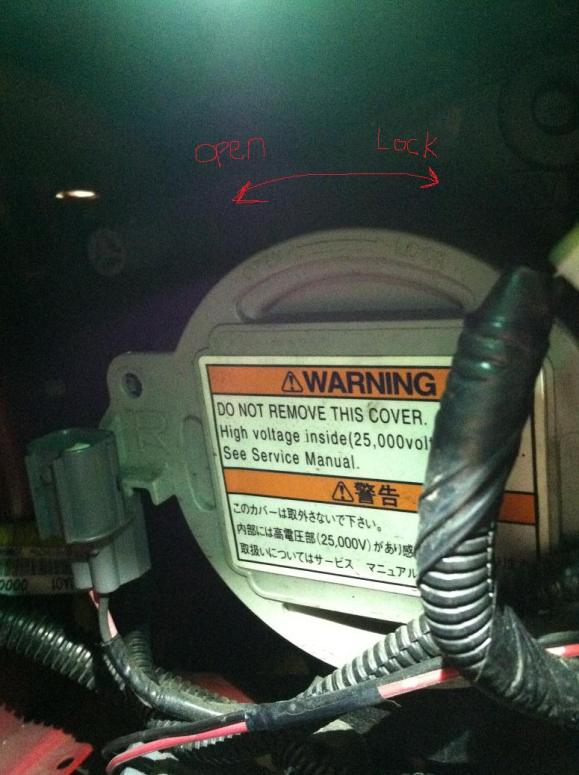
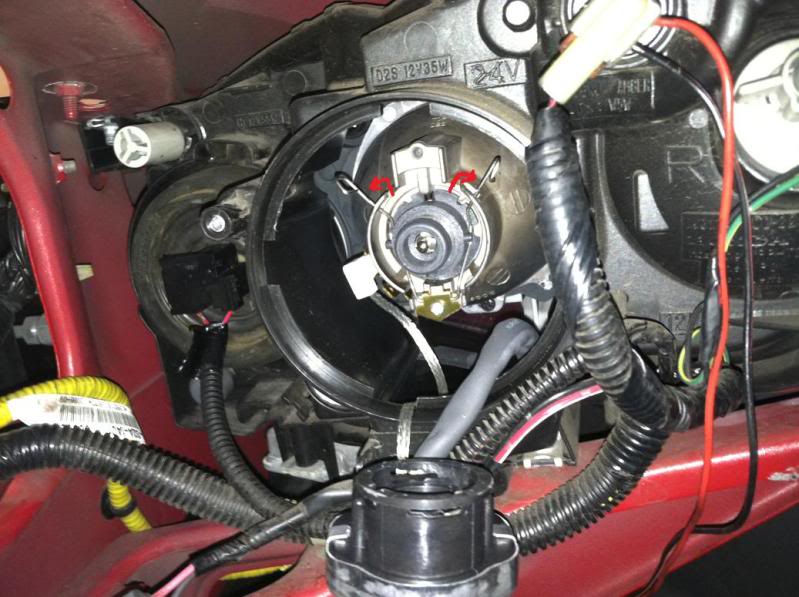
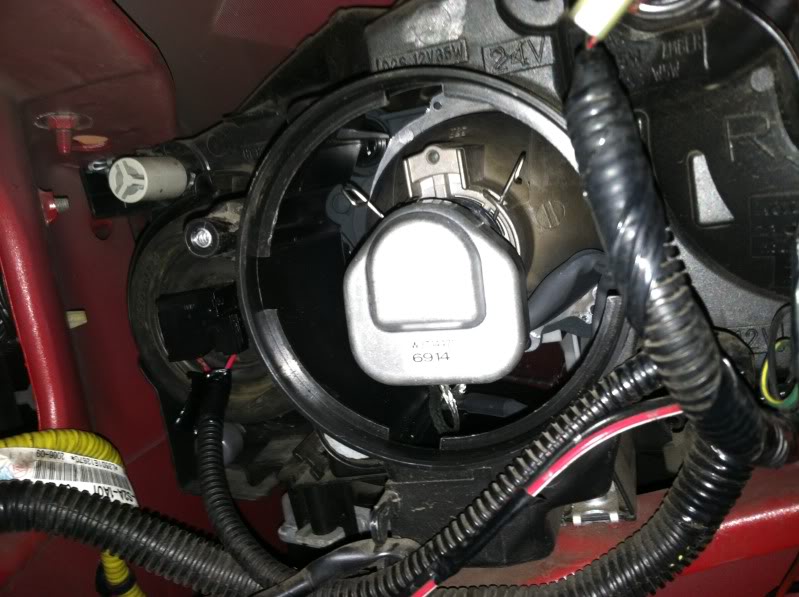
Step 8. Rotate gray cover according to arrows on cover.
Step 9. Rotate and pull off bulb connector
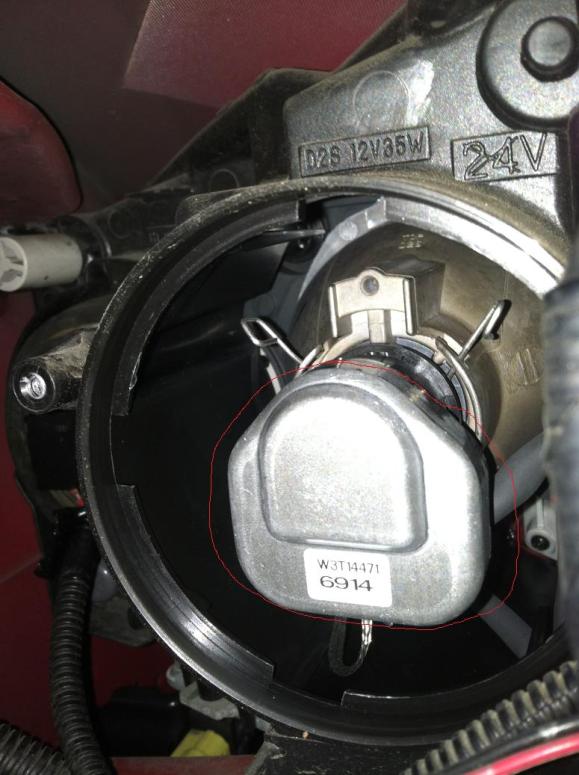
Step 10. Remove bulb retainer.

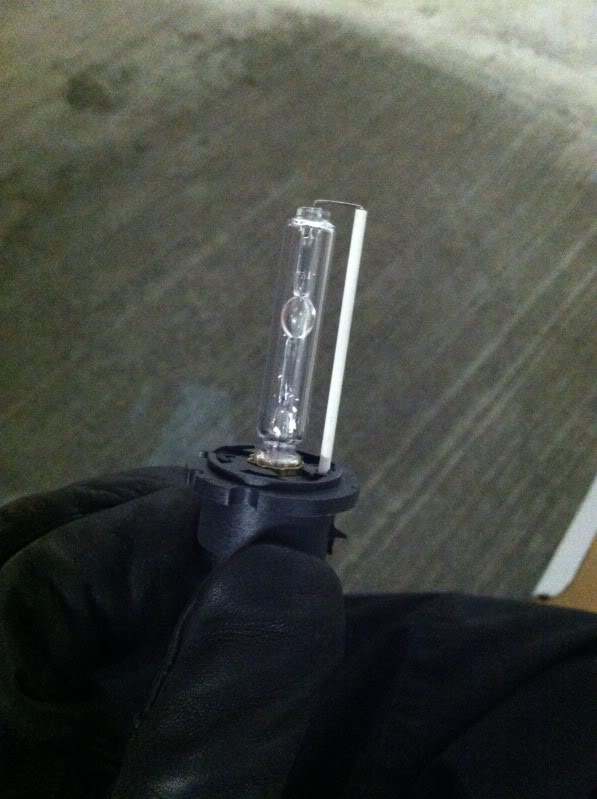
Step 11. Install new bulb
Step 12. Secure bulb with retainer
Step 13. Connect the bulb connector
Step 14. Put gray cap back on, tighten it down with the torx screw, and reconnect the ballast connector.
Step 15. Attach fender liner back into position, secure it with fender liner clips and 10mm screws.
Now do the other headlight, steps 4-15.
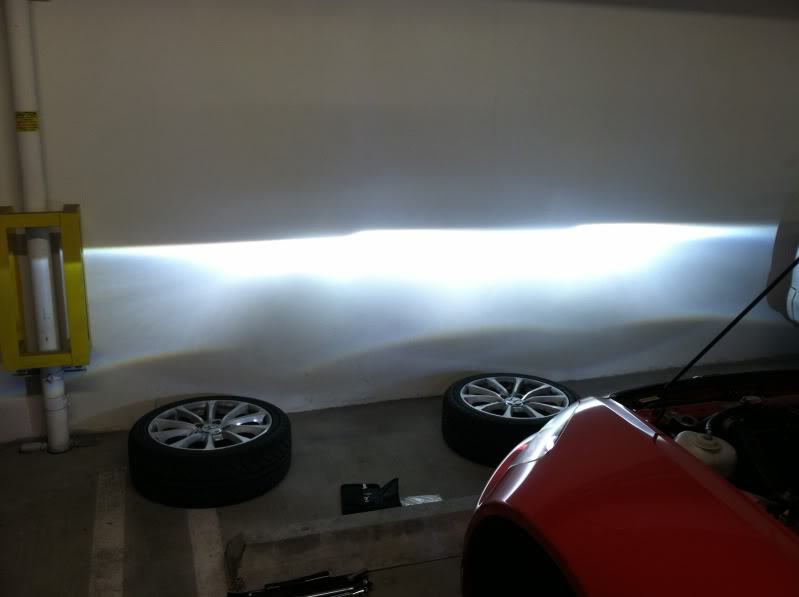
After you're done with the other side, connect the battery and test out your new lights! Easy $20 mod, 6000k looks great!
Reinstall wheels, lower car,(Don't forget to torque your lug nuts to factory specs) and you're done.
What you'll need (for the way I did it!)
1. Jack/ 2 jack stands
2. Torque wrench/lug nut socket (for wheels)
3. 10mm socket/ratchet (to disconnect battery and remove 10mm screws on bumper)
4. small flat-head screwdriver (to remove inner fender liner clips and the T25 security screw)
5. T25 Security bit (optional)
Step 1. Disconnect battery.
Step 2. Lift car and secure with jack stands
Step 3. Remove front wheels
Step 4. Remove fender liner clips and 10mm screws that retain the fender liner to the front bumper. These screws are found under the front bumper.
Step 5. Carefully pull away the fender liner, make sure you have plenty of room to work with! (makes things a lot less stressful)
Step 6. Disconnect ballast connector by pressing tab and pushing the top half of connector up. (it helps to wedge a flat-head between the tab and nub)
Ta-da it's off!
Step 7. Remove security screw. The screw is a Torx T25 security screw. You do not need a T25 security bit to remove this. I used a small flat head screw driver, like so.
This is what the screw looks like. Notice the security pin in the middle, you'd need a Torx T25 bit that has a hole in the middle to remove this. Otherwise use a flat head screw driver.
Step 8. Rotate gray cover according to arrows on cover.
Step 9. Rotate and pull off bulb connector
Step 10. Remove bulb retainer.
Step 11. Install new bulb
Step 12. Secure bulb with retainer
Step 13. Connect the bulb connector
Step 14. Put gray cap back on, tighten it down with the torx screw, and reconnect the ballast connector.
Step 15. Attach fender liner back into position, secure it with fender liner clips and 10mm screws.
Now do the other headlight, steps 4-15.
After you're done with the other side, connect the battery and test out your new lights! Easy $20 mod, 6000k looks great!
Reinstall wheels, lower car,(Don't forget to torque your lug nuts to factory specs) and you're done.

The following users liked this post:
bkjbkj (02-03-2024)


 03-13-2013, 11:41 PM
#5
Yes, stock equipment. I only swapped the bulbs out with some aftermarket 35w 6000k D2S bulbs. I purchased the bulbs from js2k.com, so far so good!


Trending Topics
04-02-2013, 12:10 AM
#8


