
AP1 to AP2 Rear Bumper Conversion


 10-10-2010, 05:45 AM
#22

Originally Posted by PAS2KNut,Nov 13 2006, 09:17 PM
DISCLAIMER: The procedures, methods and products written up here were for my circumstances only. I make no assertions that your results will be the same nor do I claim that this is the best way to do it. USE AT YOUR OWN RISK!
1. Put the car up on jack stands and remove the rear wheels.
2. Remove the one screws and one bolt on each side of the wheel well.

3. Remove the five black plastic fastners three across the top by the trunk and 2 on the bottom by the mufflers.

4. Carefully remove the cover from the sides pushing up from the bottom of the cover while pulling out. The cover should now be removed.
5. Dry fit the new rear cover installing in the oppisite as you removed it.

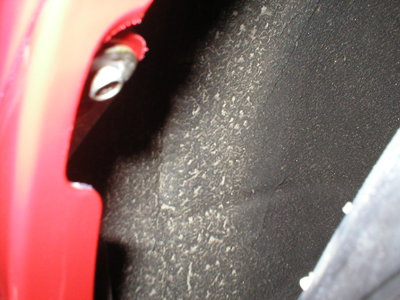
6. Measure the distance from the bottom of the cover to the bracket to determine the size of the bracket adapter you will have to make. My brackets were 1.5" on the top and bottom and 2" between the top and bottom.

I made my brackets out of stock aluminium I bought at home depot. Drill one hole on the bottom to fit the factory fastner and the second hole on top to fit the bolt you are using to mount the bracket.
7. Remove the cover and have it painted.
8. Reinstall the cover the way you took it off. Use the adapter bracket you made to mount the bottom of the cover to the car.

Install the five fastners, two screws and two bolts. Put the wheels back on and you are done.
Mods feel free to link to DIY thread. I posted this once before but it was lost.
Jim
1. Put the car up on jack stands and remove the rear wheels.
2. Remove the one screws and one bolt on each side of the wheel well.
3. Remove the five black plastic fastners three across the top by the trunk and 2 on the bottom by the mufflers.
4. Carefully remove the cover from the sides pushing up from the bottom of the cover while pulling out. The cover should now be removed.
5. Dry fit the new rear cover installing in the oppisite as you removed it.
6. Measure the distance from the bottom of the cover to the bracket to determine the size of the bracket adapter you will have to make. My brackets were 1.5" on the top and bottom and 2" between the top and bottom.
I made my brackets out of stock aluminium I bought at home depot. Drill one hole on the bottom to fit the factory fastner and the second hole on top to fit the bolt you are using to mount the bracket.
7. Remove the cover and have it painted.
8. Reinstall the cover the way you took it off. Use the adapter bracket you made to mount the bottom of the cover to the car.
Install the five fastners, two screws and two bolts. Put the wheels back on and you are done.
Mods feel free to link to DIY thread. I posted this once before but it was lost.
Jim
The helpful information on this site is amazing when you get yourself into an unexpected bind.


 04-09-2011, 07:02 PM
#24
definitely a great thread by the op, helped me immensely with the install. I used the same material, when I put it in the vice I bent it with a hammer getting perfect 90 degree angles on them, it's a great material to work with and nice and stiff to hold the bumper in higher speed conditions.
I've got pictures of the brackets I used, I can post them tomorrow as it is pretty late right now. Once the brackets were formed I used a drill press to drill the top and bottom holes exactly above eachother. I used stainless washer and bolts and nuts to affix brackets to the factory hangers, then used Honda clips to affix bumper to new hangers.
I've got pictures of the brackets I used, I can post them tomorrow as it is pretty late right now. Once the brackets were formed I used a drill press to drill the top and bottom holes exactly above eachother. I used stainless washer and bolts and nuts to affix brackets to the factory hangers, then used Honda clips to affix bumper to new hangers.
04-10-2011, 04:10 AM
#26
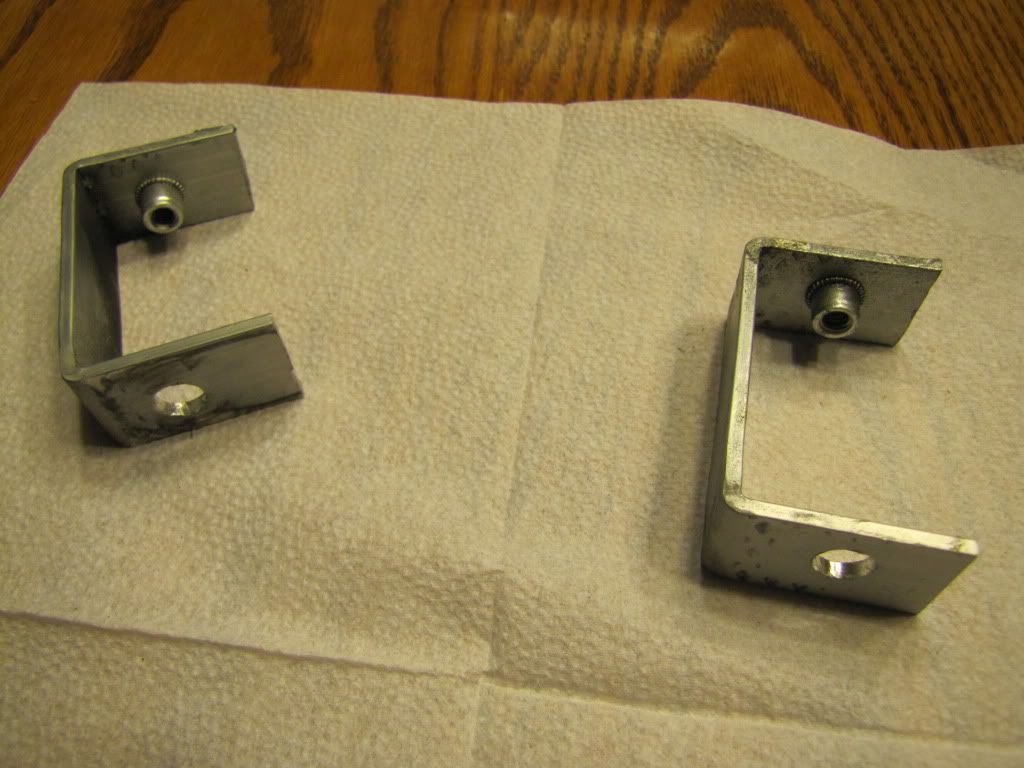
Here you are, these were the first ones I made, for some reason they turned out about 1\2 inch longer than I measured, so I made a second shorter set. But these give you an idea of how it works, the material is nice to use, soft enough to bend but firm enough to hold things in place. Notice how I got perfect corners on them, just using a vice bending initially by hand and then using a good hammer to create perfect corners. On this set I've got thread inserts in the top hole, but you dont need to use them, a plain hole works just fine and using a bolt, lock washer, regular washer and nut. I believe I made my holes are about 10mm in size, to fit a Honda plastic clip. If you use a drill press with them standing on end you can get the top hole drilled and then drill down through to the bottom hole and they will line up perfectly on the car. Be sure to hold the brackets with a vice grip or clamp when in the drill press, mine spun around and smacked my thumb pretty good one time getting away from me, ouch.

If anyone wants to buy this set I'd sell them for a couple bucks plus shipping, but they are a bit longer.
 05-17-2011, 01:24 PM
#28
Registered User

Join Date: Feb 2005
Location: Massachusetts
Posts: 606
Likes: 0
Received 0 Likes
on
0 Posts
How much you want for these shipping to 01854??
Here you are, these were the first ones I made, for some reason they turned out about 1\2 inch longer than I measured, so I made a second shorter set. But these give you an idea of how it works, the material is nice to use, soft enough to bend but firm enough to hold things in place. Notice how I got perfect corners on them, just using a vice bending initially by hand and then using a good hammer to create perfect corners. On this set I've got thread inserts in the top hole, but you dont need to use them, a plain hole works just fine and using a bolt, lock washer, regular washer and nut. I believe I made my holes are about 10mm in size, to fit a Honda plastic clip. If you use a drill press with them standing on end you can get the top hole drilled and then drill down through to the bottom hole and they will line up perfectly on the car. Be sure to hold the brackets with a vice grip or clamp when in the drill press, mine spun around and smacked my thumb pretty good one time getting away from me, ouch.
If anyone wants to buy this set I'd sell them for a couple bucks plus shipping, but they are a bit longer.
Originally Posted by vasquezgno' timestamp='1302405013' post='20448906
yes please if you can bec i want to do this n want to do it right.
Here you are, these were the first ones I made, for some reason they turned out about 1\2 inch longer than I measured, so I made a second shorter set. But these give you an idea of how it works, the material is nice to use, soft enough to bend but firm enough to hold things in place. Notice how I got perfect corners on them, just using a vice bending initially by hand and then using a good hammer to create perfect corners. On this set I've got thread inserts in the top hole, but you dont need to use them, a plain hole works just fine and using a bolt, lock washer, regular washer and nut. I believe I made my holes are about 10mm in size, to fit a Honda plastic clip. If you use a drill press with them standing on end you can get the top hole drilled and then drill down through to the bottom hole and they will line up perfectly on the car. Be sure to hold the brackets with a vice grip or clamp when in the drill press, mine spun around and smacked my thumb pretty good one time getting away from me, ouch.
If anyone wants to buy this set I'd sell them for a couple bucks plus shipping, but they are a bit longer.
05-18-2011, 08:03 AM
#29
they are easy to make bro but just becareful removing your ap1 rear bumper. On the sides there are clips you can remove but need to have like a screwdriver to push tabs out or they break.

