When you click on links to various merchants on this site and make a purchase, this can result in this site earning a commission. Affiliate programs and affiliations include, but are not limited to, the eBay Partner Network.
Can anyone tell me which part #s I need to buy in order to replace my top brushes? The 4 black ones that are on eachm side where the top mechanism goes down next to the headrest. Mine are really old and rough looking but I can't tell which part #s they are.
Thanks,
JASON
I just had a Robbins top put on my car last week, but I dont think it is going down correctly. I tried to put the tonneau cover on but it doesnt fit because the glass isnt folding into the the space correctly. It looks like it is getting stuck on the roll bar. When I put the top up the top edge of the window gets caught on the back of the storage box lid. Has anyone had this problem or know how to fix it? It doesnt look like it will go down any further so I am not sure what the problem is.
I just had a Robbins top put on my car last week, but I dont think it is going down correctly. I tried to put the tonneau cover on but it doesnt fit because the glass isnt folding into the the space correctly. It looks like it is getting stuck on the roll bar. When I put the top up the top edge of the window gets caught on the back of the storage box lid. Has anyone had this problem or know how to fix it? It doesnt look like it will go down any further so I am not sure what the problem is.
Are all the panels fitting flush? There shouldn't be anything there to get hung up on if you have an 03. Try pushing the glass toward the back by hand. Sometimes you just need to get it use to being in the right position.
Originally Posted by viper_driver,Jun 25 2009, 05:56 PM
Can anyone tell me which part #s I need to buy in order to replace my top brushes? The 4 black ones that are on eachm side where the top mechanism goes down next to the headrest. Mine are really old and rough looking but I can't tell which part #s they are.
Thanks,
JASON
Originally Posted by Cyclon36,Dec 26 2006, 12:39 PM
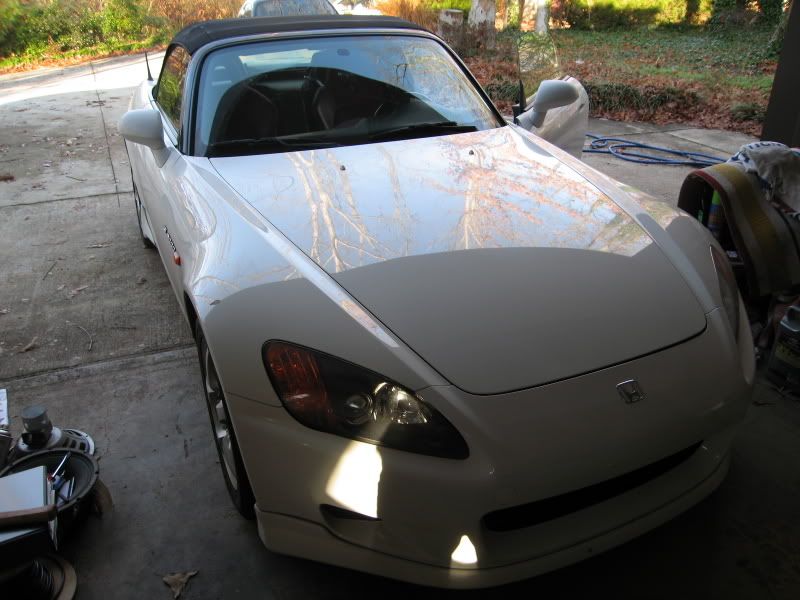
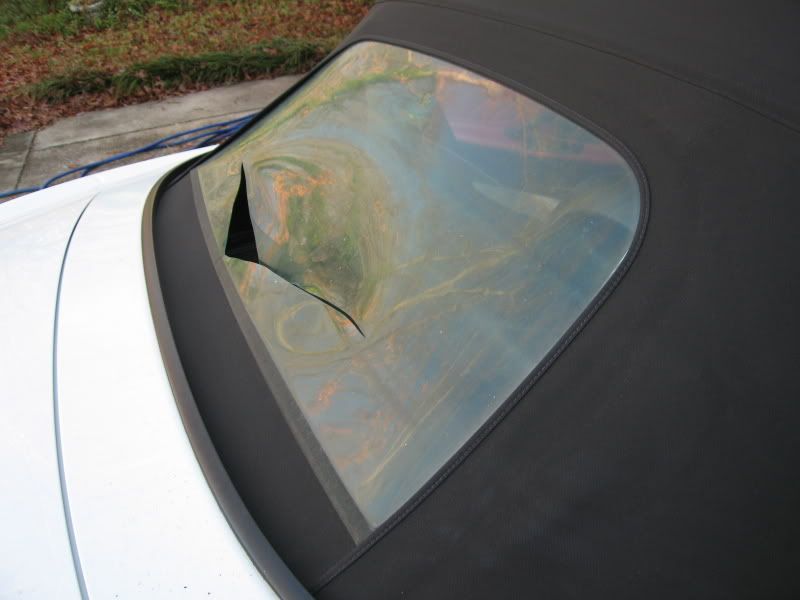
So, A few weeks ago, a local S2k owner stops by with a rather big problem:
For those that don't know, it's very bad to raise and lower the convertible top with a plastic rear window when it's cold outside (below 50F or so). The plastic gets very brittle and will crack right in half. That's pretty much what happened with this owner.
There were two options for him at this point, buy a Honda OEM replacement for $800 or so, or get a Robbins replacement top with a glass rear window for a lot less. I offered to do the install at a discounted price since this was going to help me out as well. The following is a complete walk through. Some tiny details are missing due to forgetting to take a picture every time I took something apart, but anybody that's fairly handy can handle this. I will say that while it is possible to do the install completely on your own, it is a HUGE lifesaver to have one extra person even if they have no mechanical skills at all.
Let's start by taking inventory of what tools you will need to complete the job:
Phillips screwdriver
Flathead screwdriver
10mm, 12mm, &14mm sockets and ratchets with extension
10 and 14mm wrenches
Rivet gun
Small sideways ratcheting screwdriver (usually $10 at home depot)
Drill and bits
Razor/knife
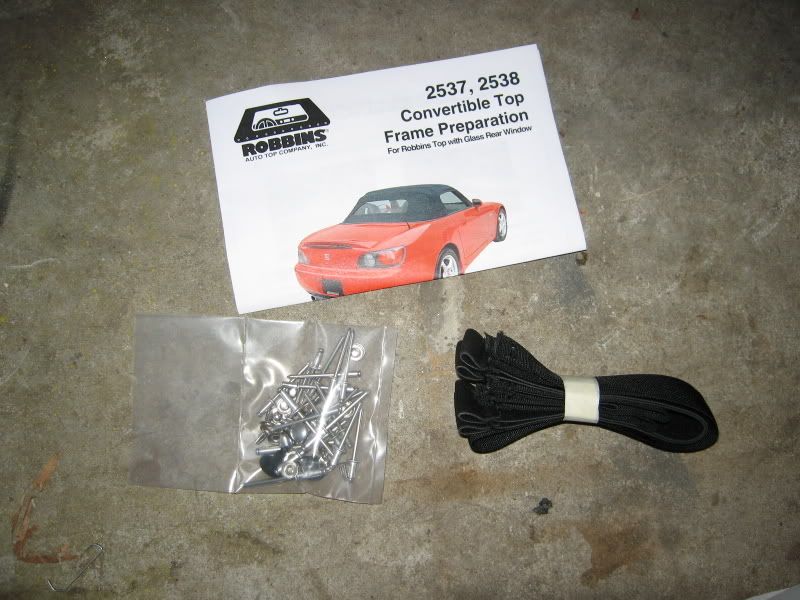
The Robbins kit includes some rivets, silver buttons, new elastic straps and retrofit straps if you're doing an upgrade to a glass back. I recommend having extra 1/4" long 4mm ( 5/32") rivets handy.
You will not be able to use the silver button snaps that Robbins includes unless you have a snap setting tool. An alternate would be to use rivets and washers to do the job. Recently I stumbled upon these from mcmaster car though:
They work perfect for attaching the rain rail and are easy to install with a flathead. A pack of 25 will be more than enough.
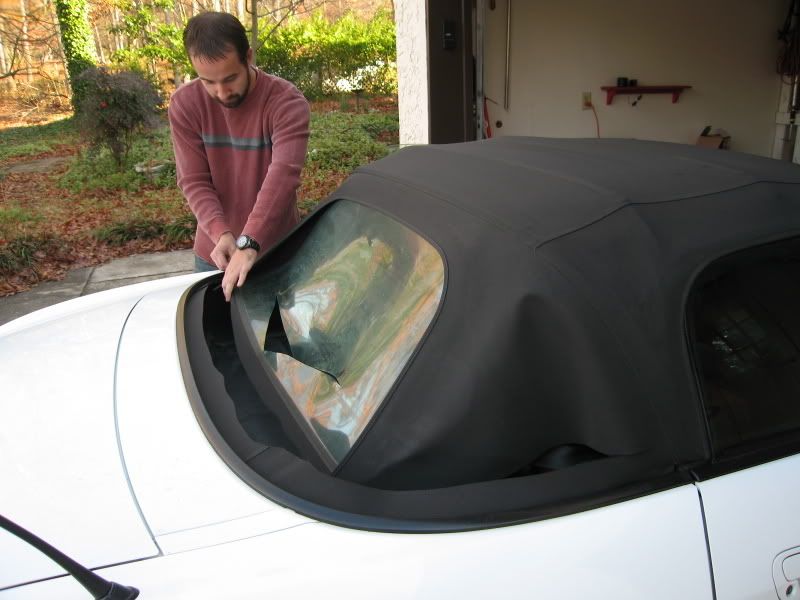
Ok, now that you have all the tools we can start removing the old top. No need to be fancy here. Just grab a razor and slice it up.
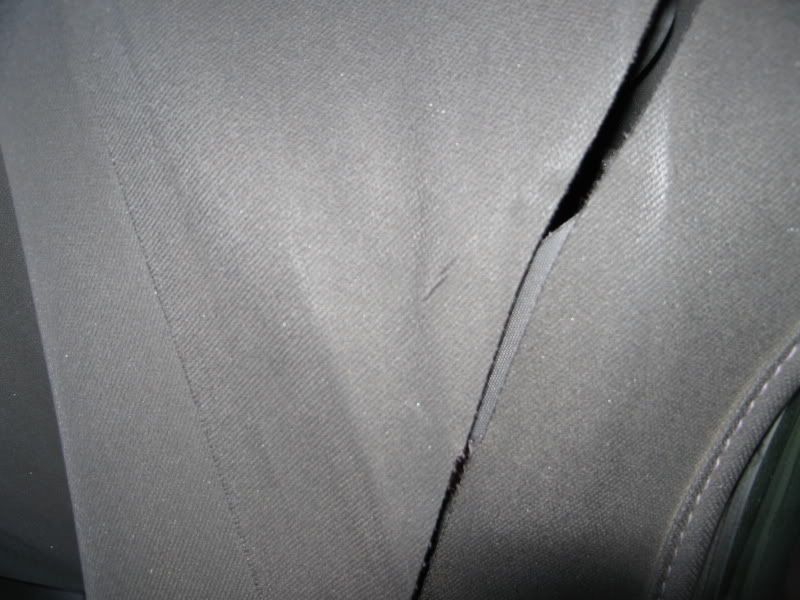
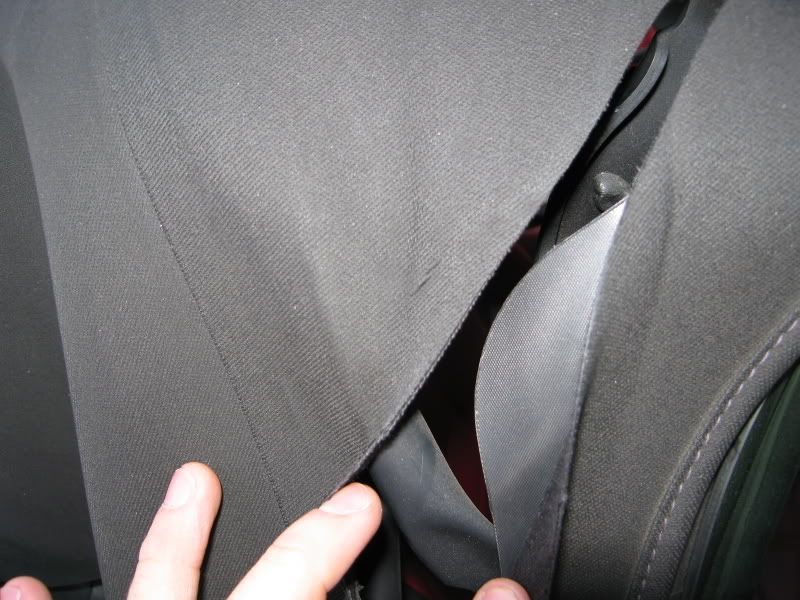
While cutting behind the window, you'll notice the plastic guard behind the top. This is the cause for the small wear holes that are common on our cars. You can see the start of the wear hole on the second pic.
Before putting the new top on, I cut two squares of material off the old top and put the between this plastic guard and the new top with adhesive. This can be done to existing tops as well and is highly recommended to prevent these wear marks from forming.
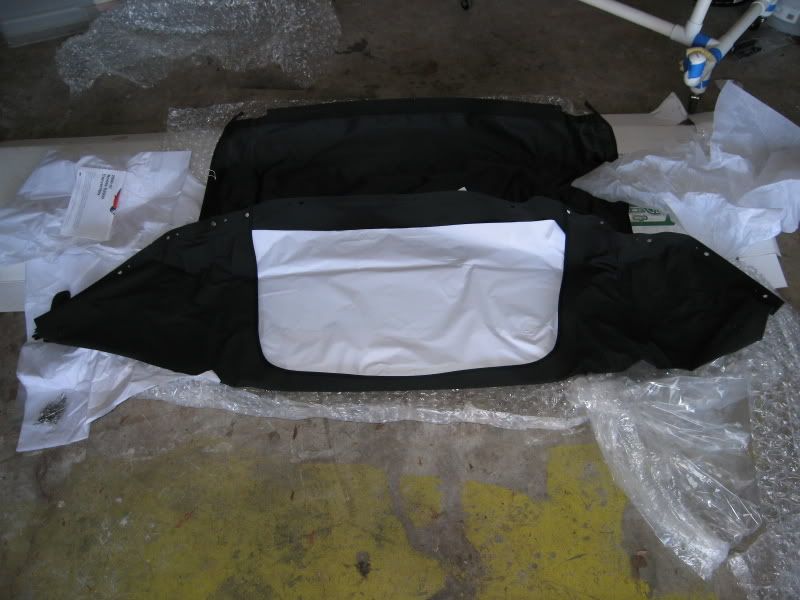
After the top is cut off (still no hardware removed), I unpacked the new Robbins top with glass window.
It comes with retrofit straps for the 00-01 frames to accepts a glass window and a bunch of rivets and some buttons that won't get used.
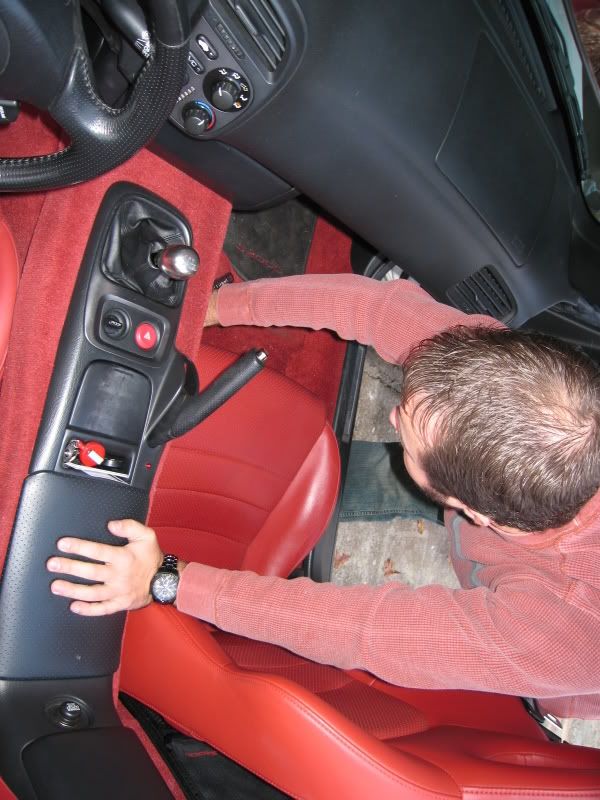
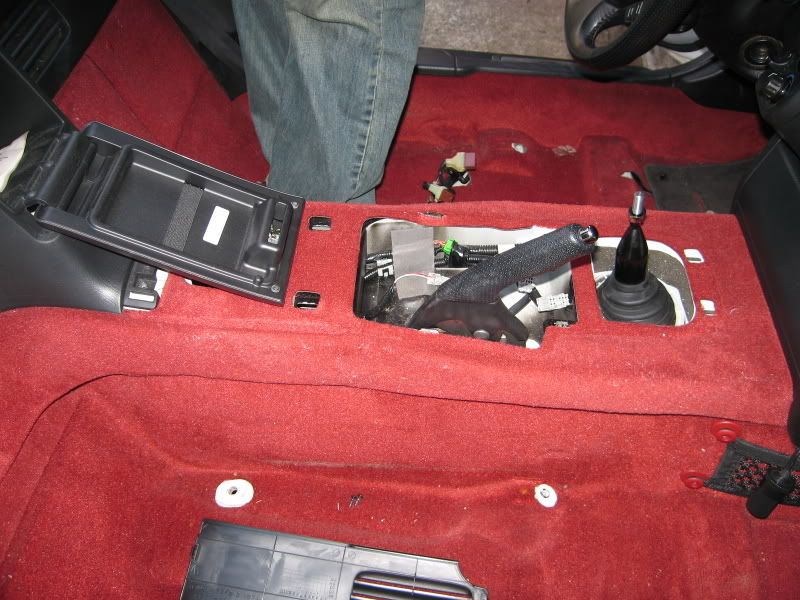
Next, I remove the seats. 12mm bolts on the front and 14mm for the rear. Very simple.
Be careful when taking out the driver's seat as there is a grey harness that needs to be disconnected from the bottom. This is your seatbelt sensor. Also, if you have an OEM alarm, your alarm module will be on the underside of the driver's seat and will need to be disconnected as well.
Next, remove the center console. The console is held on completely with clips and should be taken off by prying the rear up with your fingers and moving forward slowly. Take off the shift knob first of course. When the console is unsnapped, disconnect the two harnesses for the emergency lights and top switch.
After the console is removed, take the roof switch off by removing the two screws and reconnect it to the harness. You'll need to work the roof while doing the install and the whole console will just get in the way.
Start removing the two vent panels under the roll hoops. This is done by unsnapping the cover on the two hooks and unscrewing them using either a phillips or 8mm socket. The panels then just unsnap out of their location.
Go ahead and remove the two screws at the base of the roll hoop trim while you're at this step. Make sure to keep inventory of all the screws. Most of them are identical. Pay attention to the ones that are smaller or different so you know where they go back later.
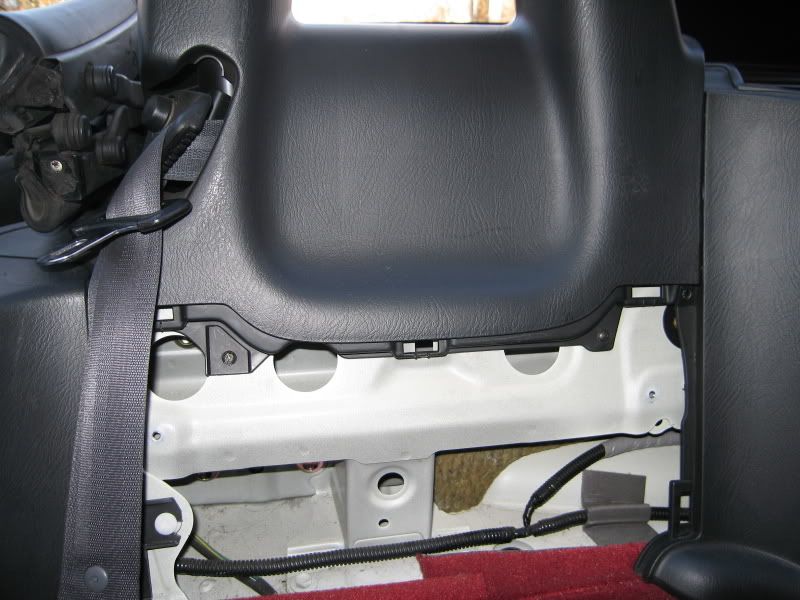
Remove the two door sill moldings. They snap off. It's easiest to start towards the front of the car and move backwards. They are held on with three white clips and interlock with the surrounding trim. Then, remove the rear door jamb trim. This is done by removing one phillips screw at the base and pulling the panel forward. The is one white clip towards the inside edge of the panel.
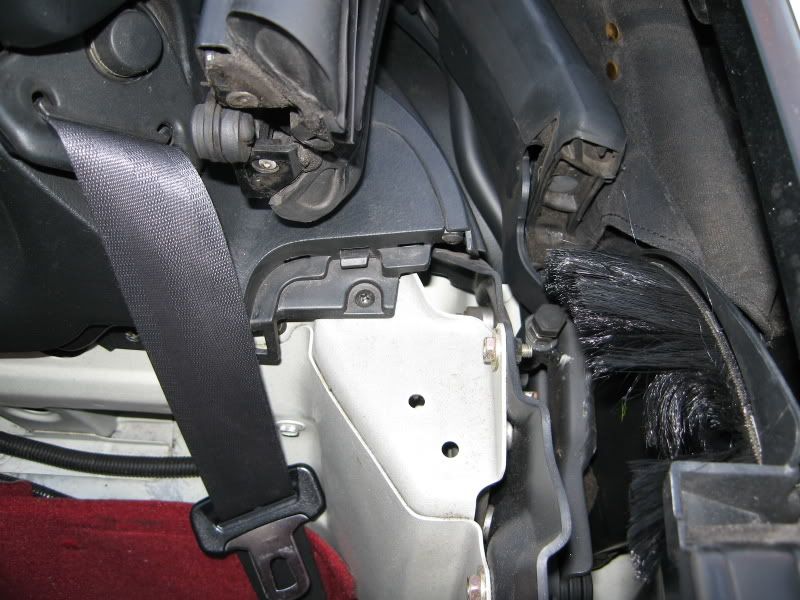
While you're there, go ahead and unbolt the seat belt bolt on the bottom. Remove the screw joining the roll hoop trim and side trim on either side. The tiny screw in the corner of the roll hoop can stay in place as the two halves of the roll hoop do not separate:
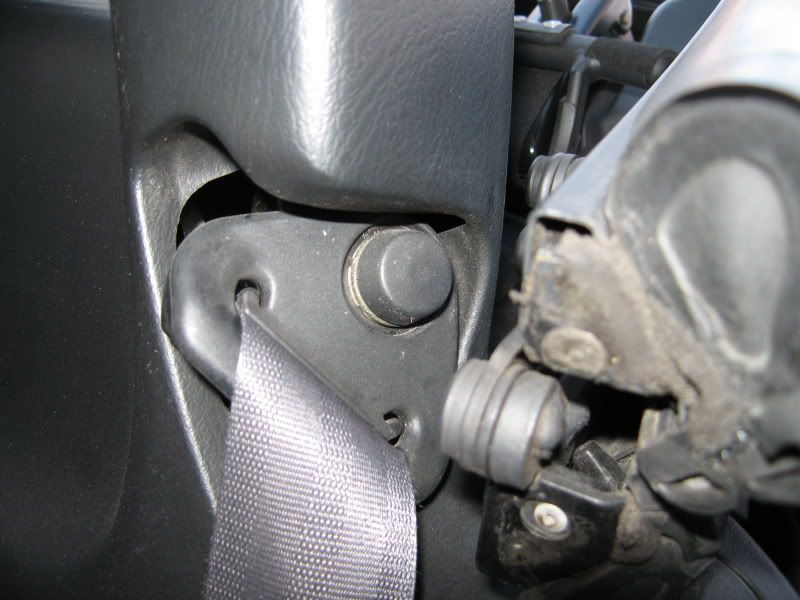
Remove the seat belt holder on the roll hoop. Take the black rubber plug off first and unbolt the assembly.
my new top has a glass insert instead of plastic, I thought most of the S2000s had the glass insert. My original top did and thats what I requested with my top when I got it replaced after getting it slashed.
Just did this last weekend...followed these directions exactly, including the McMaster barrel bolts. It was easy, took about 6 hours or so for everything. I took the roll bars out and I'm glad I did, didn't take that long and made reaching the top much easier for the install.
The top straps Robbins now includes are quite a bit different than those pictured, but they include some photos and it's pretty easy to figure out.
Oh, remember to tint the window before you install. It's easy, even a first time tinter can do the back window while it's sitting flat on a table.
I purchased Robins replacement top with glass window. I was doing ok till mid point, but I have one issue now.
At the instruction:
“Take the lower corner that goes next to the window of the new top and insert a screw through the bottom side. This was the screw covered in foam on the old top. There should be a hold in the plastic backing for the screw to pass through, but not in the material part.”
I am trying to install “the screw covered in form”. However I tried couple different things, but I cannot align holes to tight down the screw.
Is this a right direction to install? I flipped plastic tab up side down, but it was also too tight!
For my weekend project, time is up! I just installed drivers seat! I need to go to work tomorrow morning!!! If it rain, I guess I stays home... and wait for your suggestions!
Sent you a PM. I'm almost certain that the plastic tab should be pointed in. The material needs to be on top of the plastic and not underneath. The screw goes through the material first then through the hold in the plastic, then you screw it down into the plastic clip in the car.

 06-25-2009, 02:56 PM