
Vinyl Wrap DIY
 05-06-2011, 01:48 PM
#1
Registered User
Thread Starter
Join Date: Jun 2010
Posts: 984
Likes: 0
Received 0 Likes
on
0 Posts
(more diy on p.3)
i am using a kit from here for 329 plus shipping: http://stores.ebay.com/binarycustoms . it seems like its enough for the car, but not enough to make a mistake.
i also had to order the kit for $210 because i made too many mistakes and ran out of vinyl.
Its important to conserve all that you can and not make mistakes. Ive found a few ways to 'cut corners' and use a little less vinyl.
Im in the process of vinyl wrapping my car and im gonna try to get a DIY going on it. Im not the greatest and taking pictures while im in the middle of doing a project, ill do my best to get some shots to help everyone out.
Start with a clean car. clean all of the surfaces where you will be applying the vinyl, including any area behind the surface that the vinyl will need to wrap around to. get all the road grime off of the inner fender or the vinyl wont stick when your pull it around.
vinyl the easiest/flattest parts of the car first, this will let you get a hang of how the vinyl works before you start tackling more curvy areas. im using "3M 1080 Scotch Print" vinyl. it doesnt require any application liquid and so far seems pretty good to work with.
i started with the hood, it was pretty straight forward. cut the vinyl, peel the backing, lay it on the hood, apply pressure to set the vinyl (ive been using a combination of a little squeegee used for window tint, and a clean microfiber cloth), starting in the center and work your way out, stretch out the bubbles, trim, tuck the extra. the nozzles were the only tricky part and all i had to do was get a small piece of vinyl and stretch it over the nozzle, then cut out the hole for the washer fluid to come out.

The trunk had a few more curves and a few more challenges, but was also pretty straight forward. remove the emblems, spoiler, and brake light, apply the vinyl. i got some bubbles on the edges here so i took some pictures showing out to stretch those bubbles out for a smooth finish.

youll get these bubbles in a few places as your working, mostly around curves, or if you have stretched over curves, the vinyl will "collect" somewhere else and cause these bubbles, i worked this technique in a few sections and it got all of the bubbles out. reach your hand under the vinyl, stretch thee bubbles out with your fingers, then pull that section, you can use a heat gun or a blow torch to help make the bubbles disappear, but be careful, too much heat and stretch can cause thee vinyl to rip.

here i have stretched the bubbles out and quickly applied some heat from a blow torch, the bubbles are gone

with the bubbles out, i have reapplied the vinyl
and heres the trunk:

The rear quarter panel is kind of a pain, the bigger part in front of the rear tire isnt that bad, but as the panel curves back to the trunk, the vinyl collects and gets bunchy, causing lots of bubbling. patients is the best way to tackle this. Remove your gas lid and wrap that separately. I noticed that the vinyl collected a lot where the panel meets the trunk, just take your time and keep stretching the vinyl slowly and applying pressure behind your stretch with a micro fiber cloth.

because of the shape of the rear quarter panel you can waste a lot of vinyl on it. on my first attempt i tried to cut it roughly to size, but i didnt cut it right and it ruined a huge piece of vinyl. On my next attempt i said screw it, and made a seam. I used a small piece for the area in front of the rear tire, so that i didnt need a huge piece. this created a "seam", but oh well. im ok with the results, if youre not, then dont use this technique.

The front fenders are pretty easy. pop your hood before you start so you can cut a clean line on the inside of the engine bay. the vinyl rolls come in 60" sections and thats wide enough for the fender from front to back (in other words drape the vinyl down from the hood to the ground, dont unroll from the door to the bumper, it will waste vinyl), itll look about 1" short, but a little stretch will help you cover it. after the vinyl is applied, trim away about 1 inch around everywhere, and tuck the extra vinyl into the grooves using a credit card, be careful though as the credit card can cut the vinyl.
working with the vinyl so much and pulling the sticky side did start to hurt my fingers and make the red after a while.
i am using a kit from here for 329 plus shipping: http://stores.ebay.com/binarycustoms . it seems like its enough for the car, but not enough to make a mistake.
i also had to order the kit for $210 because i made too many mistakes and ran out of vinyl.
Its important to conserve all that you can and not make mistakes. Ive found a few ways to 'cut corners' and use a little less vinyl.
Im in the process of vinyl wrapping my car and im gonna try to get a DIY going on it. Im not the greatest and taking pictures while im in the middle of doing a project, ill do my best to get some shots to help everyone out.
Start with a clean car. clean all of the surfaces where you will be applying the vinyl, including any area behind the surface that the vinyl will need to wrap around to. get all the road grime off of the inner fender or the vinyl wont stick when your pull it around.
vinyl the easiest/flattest parts of the car first, this will let you get a hang of how the vinyl works before you start tackling more curvy areas. im using "3M 1080 Scotch Print" vinyl. it doesnt require any application liquid and so far seems pretty good to work with.
i started with the hood, it was pretty straight forward. cut the vinyl, peel the backing, lay it on the hood, apply pressure to set the vinyl (ive been using a combination of a little squeegee used for window tint, and a clean microfiber cloth), starting in the center and work your way out, stretch out the bubbles, trim, tuck the extra. the nozzles were the only tricky part and all i had to do was get a small piece of vinyl and stretch it over the nozzle, then cut out the hole for the washer fluid to come out.
The trunk had a few more curves and a few more challenges, but was also pretty straight forward. remove the emblems, spoiler, and brake light, apply the vinyl. i got some bubbles on the edges here so i took some pictures showing out to stretch those bubbles out for a smooth finish.
youll get these bubbles in a few places as your working, mostly around curves, or if you have stretched over curves, the vinyl will "collect" somewhere else and cause these bubbles, i worked this technique in a few sections and it got all of the bubbles out. reach your hand under the vinyl, stretch thee bubbles out with your fingers, then pull that section, you can use a heat gun or a blow torch to help make the bubbles disappear, but be careful, too much heat and stretch can cause thee vinyl to rip.
here i have stretched the bubbles out and quickly applied some heat from a blow torch, the bubbles are gone
with the bubbles out, i have reapplied the vinyl
and heres the trunk:
The rear quarter panel is kind of a pain, the bigger part in front of the rear tire isnt that bad, but as the panel curves back to the trunk, the vinyl collects and gets bunchy, causing lots of bubbling. patients is the best way to tackle this. Remove your gas lid and wrap that separately. I noticed that the vinyl collected a lot where the panel meets the trunk, just take your time and keep stretching the vinyl slowly and applying pressure behind your stretch with a micro fiber cloth.
because of the shape of the rear quarter panel you can waste a lot of vinyl on it. on my first attempt i tried to cut it roughly to size, but i didnt cut it right and it ruined a huge piece of vinyl. On my next attempt i said screw it, and made a seam. I used a small piece for the area in front of the rear tire, so that i didnt need a huge piece. this created a "seam", but oh well. im ok with the results, if youre not, then dont use this technique.
The front fenders are pretty easy. pop your hood before you start so you can cut a clean line on the inside of the engine bay. the vinyl rolls come in 60" sections and thats wide enough for the fender from front to back (in other words drape the vinyl down from the hood to the ground, dont unroll from the door to the bumper, it will waste vinyl), itll look about 1" short, but a little stretch will help you cover it. after the vinyl is applied, trim away about 1 inch around everywhere, and tuck the extra vinyl into the grooves using a credit card, be careful though as the credit card can cut the vinyl.
working with the vinyl so much and pulling the sticky side did start to hurt my fingers and make the red after a while.
 05-06-2011, 01:49 PM
#2
Registered User
Thread Starter
Join Date: Jun 2010
Posts: 984
Likes: 0
Received 0 Likes
on
0 Posts


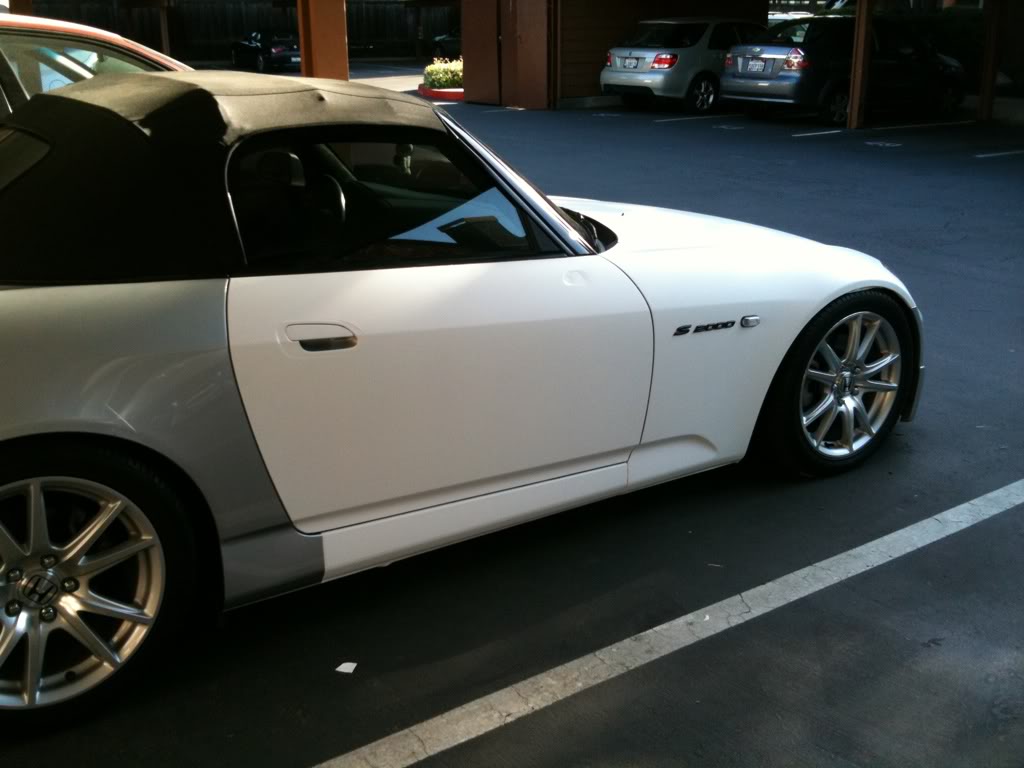
I got the passenger door done and I'm out of vinyl

I messed up on the spoiler and didn't want to waste any more so I plasti dipped over my mistakes. Too much stretch and heat caused holes. I'm not unhappy with the results.


for the door youll want to remove the mirror, i havent done my mirror yet but i know it will be easier with the mirror off.
remove your inner door panel and behind the mirror mount youll find 3 nuts holding it on, take them off, unplug the mirror.
you should also remove the upper door trim that meets with the window so that the vinyl will be tucked under that you cutting will be much easier.
i made a mistake at the top of the door and tried to stretch it out to fix it, but it ripped, so i pulled and stretched more, but it made it worse. im not sure what ill do with it yet, i might use the same technique above with the seam, and just cut the messed up area and make a sort of cover for it out of a small strip of vinyl. if i have enough ill redo the door, if not, ill use a strip and order more vinyl to redo the door later.
 05-06-2011, 01:49 PM
#3
Registered User
Thread Starter
Join Date: Jun 2010
Posts: 984
Likes: 0
Received 0 Likes
on
0 Posts
a few more pics. ill be organizing this thread a little more later.
i messed up a small area on top of the door and tried to pull and stretch it out, but i made it worse. ill be finding a way to fix it later.

heres the front right now, im wrapping the inner areas with separate pieces because i dont think ill be able to stretch one big piece enough to get into all of the curves. i did the same with the rear bumper pictured above.

i messed up a small area on top of the door and tried to pull and stretch it out, but i made it worse. ill be finding a way to fix it later.
heres the front right now, im wrapping the inner areas with separate pieces because i dont think ill be able to stretch one big piece enough to get into all of the curves. i did the same with the rear bumper pictured above.
05-06-2011, 02:10 PM
#4
Registered User
Thread Starter
Join Date: Jun 2010
Posts: 984
Likes: 0
Received 0 Likes
on
0 Posts
random tips ive pick up on:
Start with the easiest places first. In order I think this would be; hood, front fenders, trunk, doors, rear fenders, bumpers.
Use a credit card to gently push the vinyl into seams and then cut the excess. I have spots that I cut then folded, and honestly it looks good outside, but it's sloppy on the under side.
Start in the middle of your panel that your working on and go outwards from there. This will let you work bubbles to the outside and not have them bunched up.
Avoid stretching as much as possible. It helps get rid of an immediate problem, but causes a newer bigger one somewhere else.
after i took my fender badges off, i left a little bit of the glue so that i would know exactly where to put the badges back on.
the key hole covers from JS2K will make trimming the key hole area much easier and cleaner.
More to come.
05-06-2011, 04:55 PM
#5
Registered User

Join Date: Jan 2009
Location: United States
Posts: 89
Likes: 0
Received 0 Likes
on
0 Posts
I always wanted to wrap my RSX matte white also but never had the time nor wanted to push my luck. After looking at how it goes i'll see if I can free up some time. You are brave to do it outdoors by your self. Good luck!
05-06-2011, 07:04 PM
#6
Registered User

starting to look real good, can you take some pics of the inside of the hood and trunk, where it is tucked and finishes. Also the wheel arches and doors. I want to get a sense of how it looks once the doors, trunk, and hood are opened.


Trending Topics
05-07-2011, 07:21 AM
#8
Registered User

Join Date: Feb 2010
Location: Stamford, CT
Posts: 3,263
Likes: 0
Received 0 Likes
on
0 Posts
Sweet man!! Take a video of you doing it close up and speed it up and put that shit up! I really wana try this with red, red is my only other color i want for my S

