When you click on links to various merchants on this site and make a purchase, this can result in this site earning a commission. Affiliate programs and affiliations include, but are not limited to, the eBay Partner Network.
I just completed the installation of my new amplifier on PAS2KNUT's amp cover. Here are some pictures of the work in progress and the final result. Thanks to pas2knut for uploading the pictures.
This first picture shows some details of the wiring. I already had a professionally installed amplifier in my trunk. When adding the second amp, I wanted to disturb the professional work as little as possible. On the left you can see the grounding points for each of the two amps (separate but close to each other). On the right you can see a 4 awg "T" block that connects both amps to the +12V cable from the battery. Above you can see some speaker wire as well as the blue turnon lead that goes to the back of the head unit.
This next picture shows the connections between the amps. The yellow cable is RCA cable. It routes the passthrough preamp output of the first amp in the tool well to the left and right RCA inputs of the amp I'm adding. A little harder to see is some speaker cable that connects the remote turnon terminal of the first amp to the 2nd amp's turnon terminal. Since the pros already took care of running a turnon lead to behind the head unit (see blue wire in above picture), all I needed to turn the 2nd amp on was this "jumper" cable.
This next picture shows the signal input side of the new amp. There's nothing unusual here. I'm only posting it for your information. I took a picture of the power and speaker output side of the amp but it came out even more blurry than this one so I won't trouble you with it.
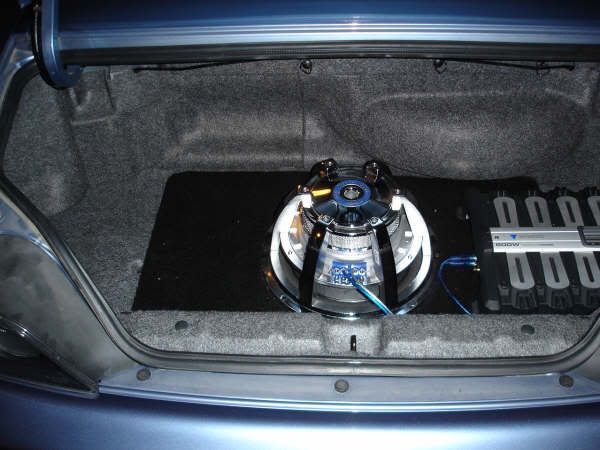
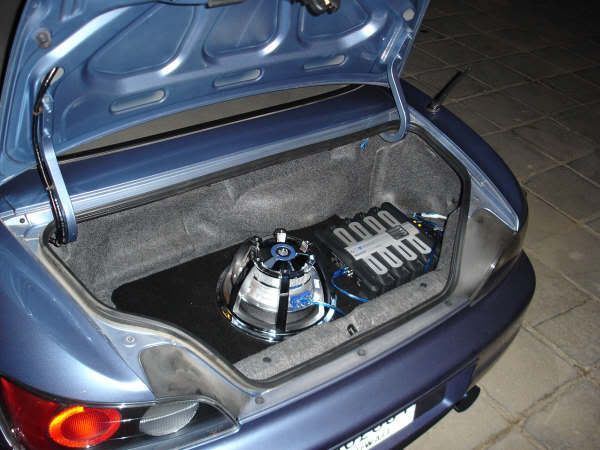
This last picture gives you the final, "buttoned up" look of the installation. Besides the new amp, this picture features PAS2KNUT's excellent flat cover. I am very happy with the cover and with the overall look of the install.
Things still left to do:
- devise a way to protect the exposed wiring
- build the enclosure to contain the sub that the new amp will power
Enjoy the photos and don't hold back your questions and comments.
Thanks for looking.
Where'd you get the little metal handles on the sub box?
Probably any hardware store(Lowe's, Home Depot, ACE).
Hey, I've got an issue I can't seem to get resolved.
Mono Amp. DVC 4 ohm each side. Wired pos from amp to pos on both sides of the sub. Neg amp terminal to neg terminals on sub. Amp is clipping and going into protect mode. Tried swapping out wires to make sure there was not short and same issue! Any suggestions>
Originally Posted by S2KSpaYellow,Mar 23 2006, 10:35 PM
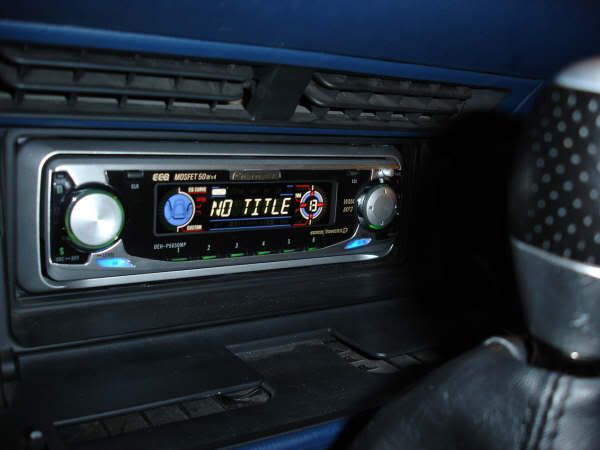
Here is my install. Stock head unit, two Lanzar Vibe 1000 amps, MB Quart components up front and a JL sub in the tool well.
Not bad! I think you should run those RCA cables under the amp rack, though. I've got a feeling that it would make the entire set-up look a heck of a lot cleaner! That is if you haven't done so already.
Originally Posted by Waterbug,Feb 8 2004, 09:11 PM
sure. This drawing was made by someone on here, I think their name was b0mb3rman
Mine ended up changing a bit, but this drawing is definitely a good starting point. I used 5/8" mdf rather than 1/2" so I had to acount for that change, and I didn't use a spacer, I just made the top piece the shape of the the well. The box didn't sit as low as I was expecting, or else I would have just made the 13x22 top and then cut out another piece to lay over everything so that the subwoofer would be flush with it as well as the rest of the trunk. It ended up that the top piece was perfectly flush with the trunk though and the subwoofer sticks up above that.
And I don't remember the angles, but just use a little trigonometry
does anybody have a diagram like this but for the side mount sub box? thanks
How did all of you attach the amp rack that covers the tirewell and runs across the trunk from left to right? I've got mine cut but don't want to be drilling a whole bunch of holes in the car.

 03-08-2006, 04:17 PM