When you click on links to various merchants on this site and make a purchase, this can result in this site earning a commission. Affiliate programs and affiliations include, but are not limited to, the eBay Partner Network.
mav, your ASM radiator pic is made for the ASM intake. the pre-cut part for the snorkel is kinda large for the J's racing intake.
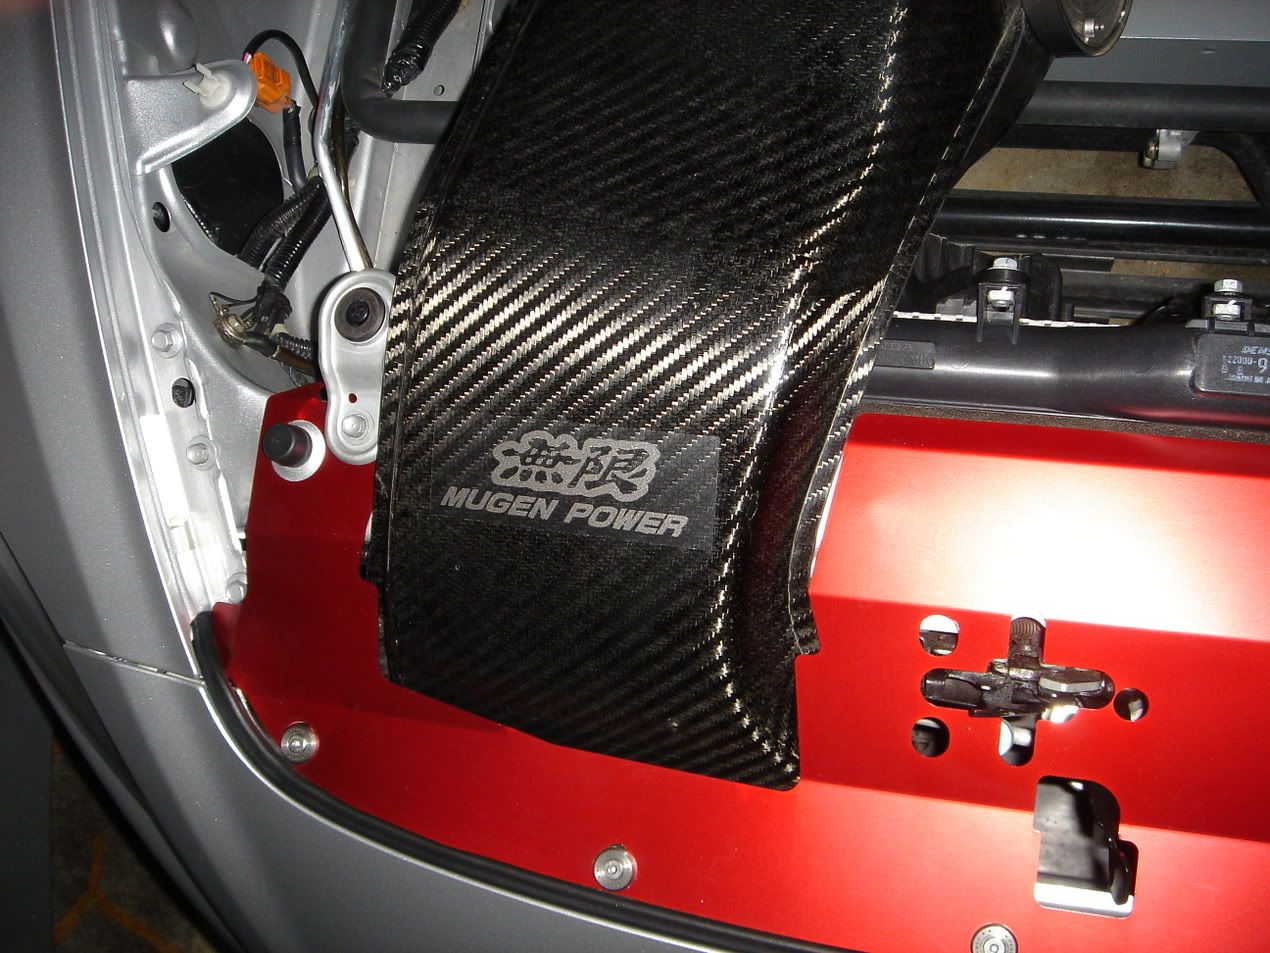
Yeah I know that the ASM Radiator Plate is for the ASM or Mugen intake but I really like the red color so its all good. I'm kinda going after this look...
Except instead of the GruppeM intake, I have the J's. I was originally planning on the GruppeM/ASM combo but ASM no longer produces this version of its radiator plate so I switched over to the J's intake. After its all installed, if the gapping hole bothers me, I can always exchange the ASM radiator plate for the J's carbon fiber one.
[QUOTE=mav,Dec 1 2005, 04:30 AM] Yeah I know that the ASM Radiator Plate is for the ASM or Mugen intake but I really like the red color so its all good.
[QUOTE=AJ PwR,Nov 30 2005, 03:30 PM] 1)Remove your stock airbox. Disconnect all the hoses and pipes which attaches to the intake. Disconnect the hose to the valve cover and to the intake pipe.
2) install that rubber piece (with two side thread) on to the right side of the chassis beam (the beam underneath the airbox). Then bolt the vacuum purde valve on the rubber piece with two side screw. Re-hook the vaccum lines.
From my understanding of Ben @ AJ-R's instructions, I do the following to assemble the intake...
1. Attach this rubber thing to one end of the Tsuchinoko chamber.
2. Attach the filter to the other end of the Tsuchinoko chamber.
3. Attach the Tsuchinoko chamber with the filter into the snorkel. Fit the adpater plate onto the four screws and tighten them with the four supplied nuts.
Is this correct?
There are 3 supplied metal ring clamps, where do they go?
In AJ-R's instructions, what is the rubber piece, vacuum purde valve and step hose?
In my current setup, the AEM V2, the OEM map sensor is attached to the intake. In my new J's setup, where does the map sensor go?
On the underside of the snorkel, towards the top, by the opening where the filter goes in, there is a tiny hole. What is this hole for and how is this used in the installation process?
And finally, what is this thing? I think its the vacuum purde valve? If so, am I supposed to tighten both sides prior to inserting it into the rubber hole in the Tsuchinoko chamber?
Sorry for all the dumb questions, but without the instructions, I have no clue what goes where and I'm a n00b where it comes to mechanics.


 12-01-2005, 03:30 AM


 Nice parts


