When you click on links to various merchants on this site and make a purchase, this can result in this site earning a commission. Affiliate programs and affiliations include, but are not limited to, the eBay Partner Network.
before painting those exposed steel braces put either FOSS or OSPHO on it to treat and prevent rusting from under the paint . its what I am using on both the 67 stangs I have .
Originally Posted by JohnsS2000,Aug 25 2008, 09:04 PM
before painting those exposed steel braces put either FOSS or OSPHO on it to treat and prevent rusting from under the paint . its what I am using on both the 67 stangs I have .
to late they are painted with rustoleom.
I'm sure they will be fine... they only need to look good for the pics I take as it goes back together....lol
I used to have an aftermarket fuse box under the hood near the factory box. I've decided to move it into the car on the passenger side of the dash and keep it out of the elements.
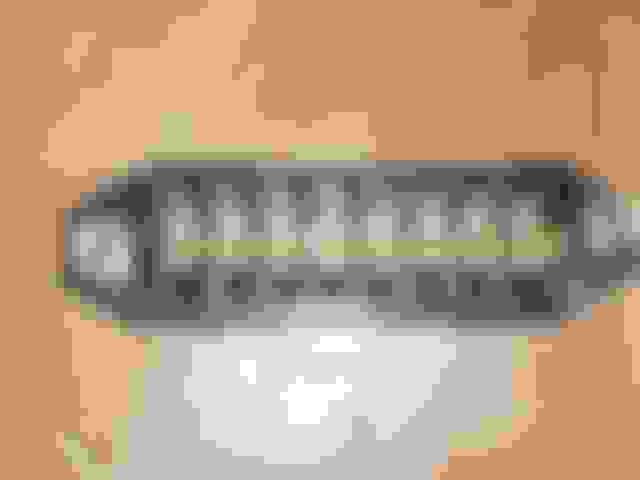
Here is a pic of the new fuse box before I modified it. This box came with 8 inputs and 8 outputs. I need one input from the battery, and 8 outputs to the goodies.
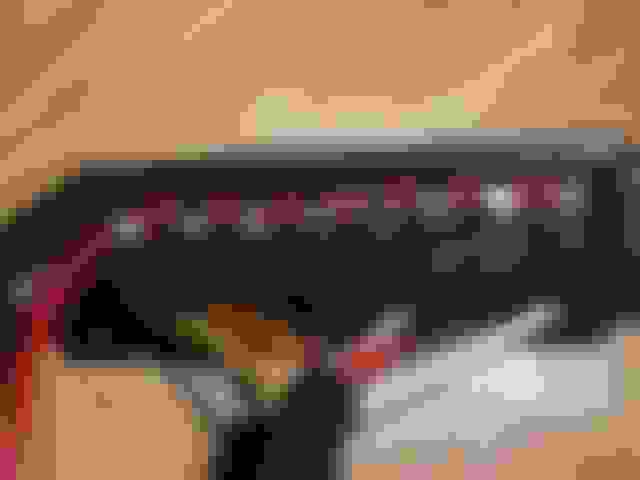
I had to remove the terminals, and grind out a channel so I could lace the input side with one wire. this one has the channel cut out.
In keeping with my goal to be able to service all connections, I soldered in a connector that will let me easily disconnect the accessories
Power input is red. One wire stripped in sections and soldered to the terminals
New Harness with disconnect. All wires will be labeled when it's done
Damn my back hurts.... leaning over the trunk, seems to be the hardest part so far
I removed the fuel pump cover and decided to coat the under side. the cavity is right around the exhaust and I'm sure it must resonate and contribute to the noise. I want to hear the exhaust, I don't want to hear the metal of the car resonating.
Fuel Pump Cover
I also got most of the trunk done today, Maybe one more coat in the morning. BTW Tin foil is a great way to mask odd shaped stuff. and it's way easier to remove than tape. then it's on to the spare tire area up to the cabin. At least I can do that from the inside, I have to believe my back will appreciate it.


 08-26-2008, 02:09 AM