
eXedium Racing Engine Mount Rings
 01-10-2012, 06:37 PM
#1
Former Moderator


Thread Starter
VEX Motorsports let me try out the new eXedium Racing Engine Mount Rings and wow! I hope you have great dental coverage lol
The throttle response was fantastic but omg the vibrations that transfered through were a bit much for my street car but I would definitely run these if I had a dedicated track or race car.
Hand tools needed 10mm, 14mm and 17mm sockets.

Remove the 10mm bolt for the ground wire.

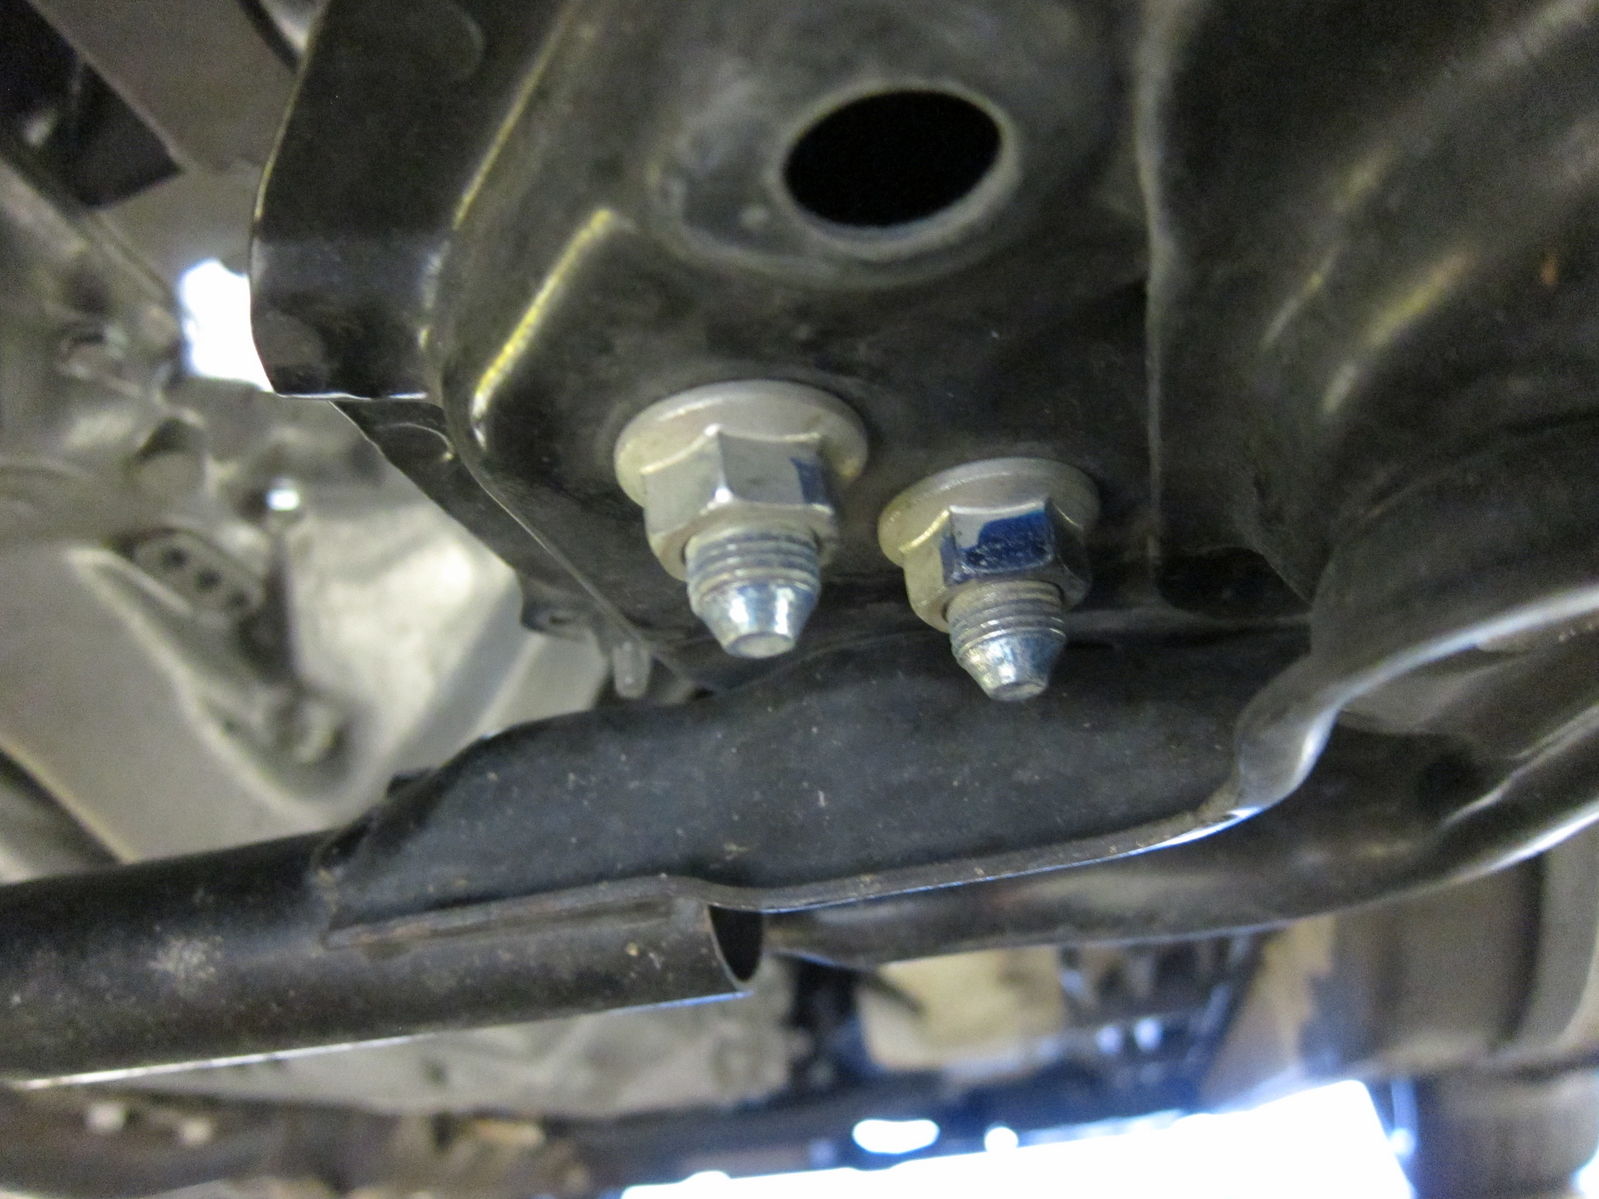
Loosen the two 17mm lower motor mount nuts on each motor mount so a total of four nuts will be loose.
They should look like this and really more so like the one on the left.

Now you'll need to support the motor with a jack, I used some cardboard and a couple of pieces of wood to do this.
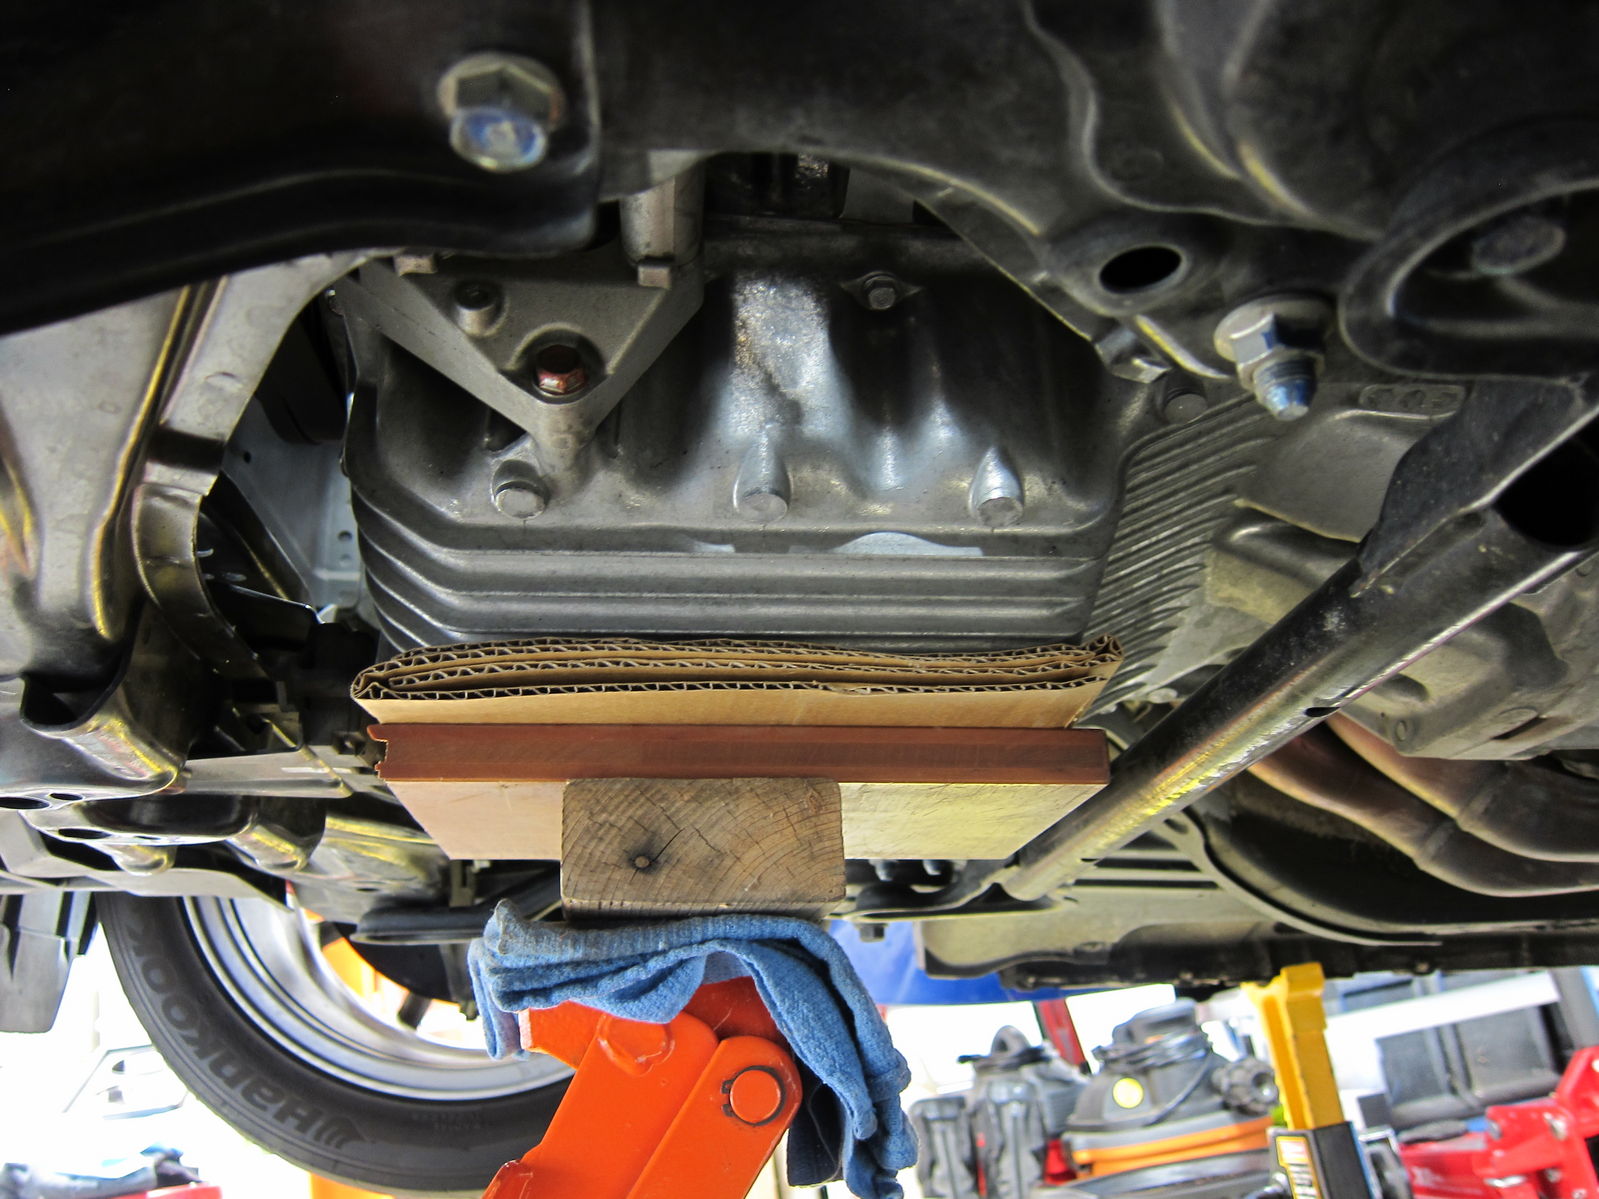
Jack up the motor so the oil pan and oil pan bump protector look like this or until the studs of the motor mounts start sliding up. Since I started with the passengers side I removed the two nuts that hold the motor mount to the sub-frame on that side. If your car is a bit rusty you might need to loosen the 17mm nut at the top of the mount now since it'll be harder to do when it's removed from the car.

Remove the four 14mm bolts that hold the motor mount bracket to the engine block and lift the assembly up to get the two studs of the motor mount out of the sub-frame, you might need to jack up the motor a bit more to get it out.

Remove the 17mm nut and the steel support piece, slide the engine mount ring over the mount and place the steel support back on the mount so it looks like this.

Once it looks like this you can tighten the 17mm nut and it's ready to be installed.


Install the mount and tighten the four 14mm nuts and lower the motor to get the motor mount studs to slide through the sub-frame and put the two nuts back on loosely like earlier.
Follow the same steps for the drivers side mount and it should look like this when being removed and out of the two this one is the most difficult.
Pics of what they look like installed, don't forget the ground wire.
Drivers side

Passengers side

Torque specs
10mm bolt is 8.7ft lbs
14mm bolts are 28ft lbs
17mm nuts are 40ft lbs
As always, be safe, use the correct tools for the job and always use wheel chocks. For added safety throw a wheel under your car, a wheel under your car in an earthquake could save your life.
If you see a mistake please let me know so I can correct it.
The throttle response was fantastic but omg the vibrations that transfered through were a bit much for my street car but I would definitely run these if I had a dedicated track or race car.
Hand tools needed 10mm, 14mm and 17mm sockets.
Remove the 10mm bolt for the ground wire.
Loosen the two 17mm lower motor mount nuts on each motor mount so a total of four nuts will be loose.
They should look like this and really more so like the one on the left.
Now you'll need to support the motor with a jack, I used some cardboard and a couple of pieces of wood to do this.
Jack up the motor so the oil pan and oil pan bump protector look like this or until the studs of the motor mounts start sliding up. Since I started with the passengers side I removed the two nuts that hold the motor mount to the sub-frame on that side. If your car is a bit rusty you might need to loosen the 17mm nut at the top of the mount now since it'll be harder to do when it's removed from the car.
Remove the four 14mm bolts that hold the motor mount bracket to the engine block and lift the assembly up to get the two studs of the motor mount out of the sub-frame, you might need to jack up the motor a bit more to get it out.
Remove the 17mm nut and the steel support piece, slide the engine mount ring over the mount and place the steel support back on the mount so it looks like this.
Once it looks like this you can tighten the 17mm nut and it's ready to be installed.
Install the mount and tighten the four 14mm nuts and lower the motor to get the motor mount studs to slide through the sub-frame and put the two nuts back on loosely like earlier.
Follow the same steps for the drivers side mount and it should look like this when being removed and out of the two this one is the most difficult.
Pics of what they look like installed, don't forget the ground wire.
Drivers side
Passengers side
Torque specs
10mm bolt is 8.7ft lbs
14mm bolts are 28ft lbs
17mm nuts are 40ft lbs
As always, be safe, use the correct tools for the job and always use wheel chocks. For added safety throw a wheel under your car, a wheel under your car in an earthquake could save your life.
If you see a mistake please let me know so I can correct it.


 Nice writeup Mac. We use these on my car as well.
 01-11-2012, 08:53 AM
#5
Former Moderator
Thread Starter
The part prevents the stock motor mount from compressing and extending, it basically turns your stock mounts into a solid like mount to drastically reduce engine movement.

