viNz86 Project Wide Black C_ _ _ PAGE 28 [Magazine article, Life + more]
#1
Hi All...
Here is an update of old thread: https://www.s2ki.com/forums/index.php?showt...&#entry18334327
A lot has changed and things didn't go as I wanted it to go, I'm really happy with the results though.
Shout outs to people that have helped me with my annoying questions...kim, brian, nick, jackie, vancouver s2ki - bbm group, john, charles, colin, berlina black drivers, speed syndicate...everyone that I missed.
Some notes:
1.) Time to save up for a winter project. Should I boost or buy new wheels?
2.) I was not budgeting for this as I wanted to work on my motor. I had to cut down costs by learning and doing a lot by myself. It was one hell of experience!
3.) I still haven't fixed my bumper (ripped it off on a local track, clipping the apex), ran out of time and budget...next month
4.) I need to get this car back on the track...the wide fender project took away from track my budget. I'm excited to try wider tires!
5.) I still need to re-mount my spoiler back, but I don't have time to re-paint and fill the holes right now. Next month?
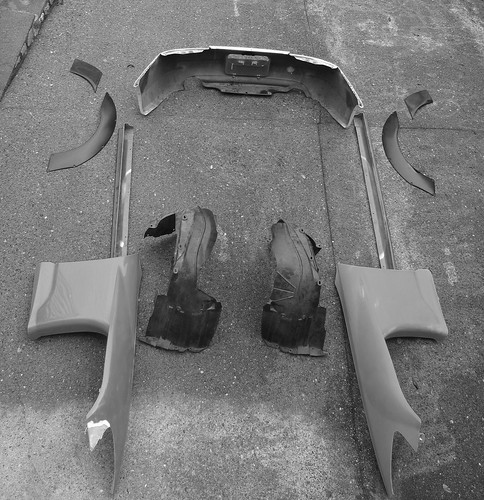
After months of collecting parts, I finally got everything together. The best way for me to save money is to repair damage parts and prep all body work. All I did was pay for paint (since I don't know how to paint!)
Spoon Fenders
J's Racing Sides
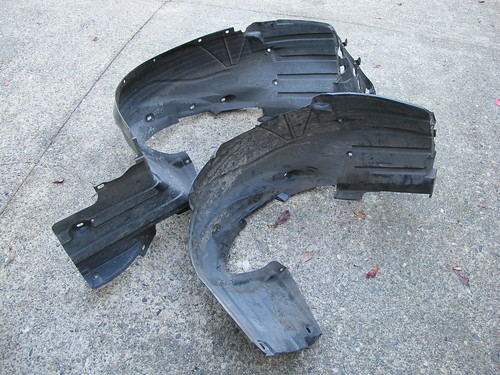
New OEM Fender Liners...cut and trimmed
Overfenders
Extensions (never used)
AP1 Bumper...possibly single exhaust cap down the road?
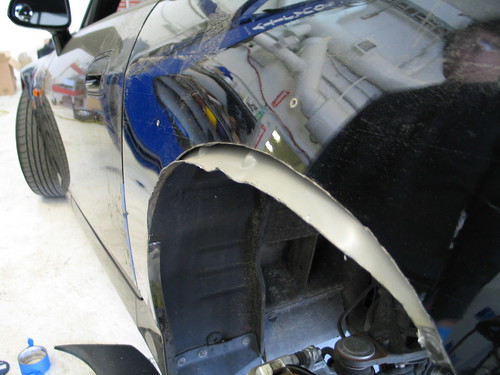
My first tasks were to cut the 1/4 panels (all the photos during this are on my buddies camera...sorry). This was done at a local shop, Speed Syndicate, as I don't have all the tools. Curtis/Alex you the man!
Mask off
Cut outer
Flare up inner
Hammer, hammer, hammer
Tack weld inner + outer
Seam sealed
Coat...coat...coat
Riv-nut

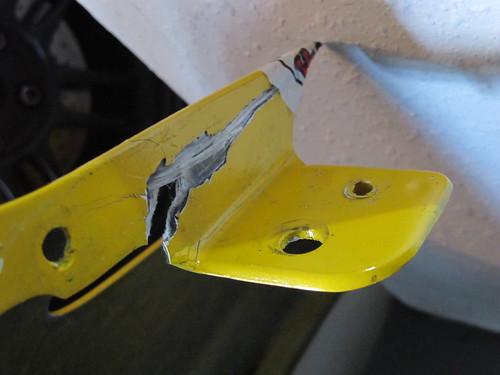
My second task was to repair all broken parts or do all fibreglass work. It was a learning process for me so I had to start small. This was my first attempt.
Sanded
Grinded
Pre-cut fibresheets
Mixed resin + catalyst
*crossed fingers*
Broken Parts:
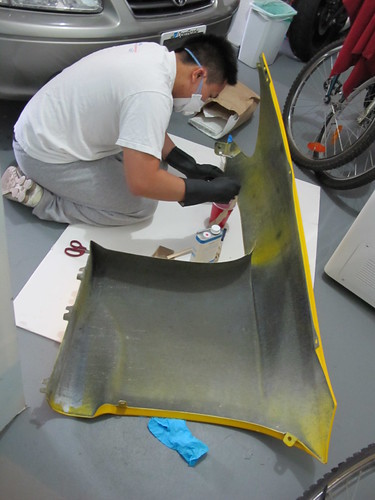
Me, hard at work:
Repaired:
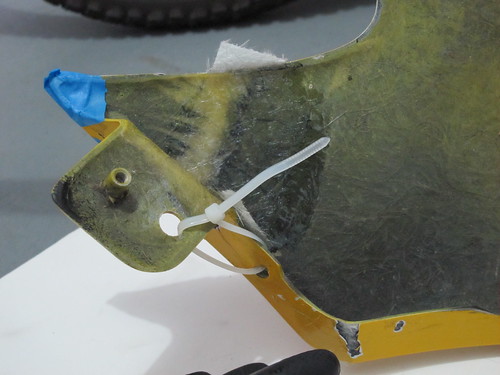
*err should've taken final photos where I sanded down the fender, body filler and shaped. I guess I got "in the zone"...
Next on my list was to remove all body parts and install new ones:
Front bumper off
Rear bumper off
Fender liners off
Fenders off
Modify Ap1 bumper to fit
Add new fender liners
Cool shot:
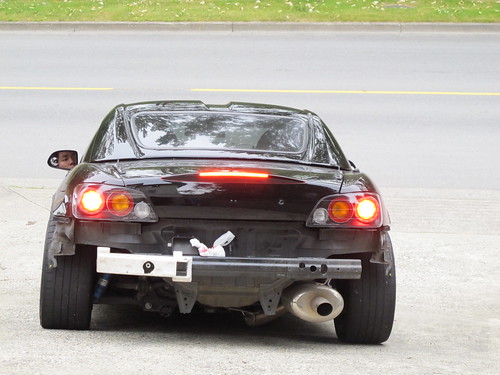
Car parts everywhere:

Comparison of OEM fender liner vs trimmed fender liner for Spoon Fenders:
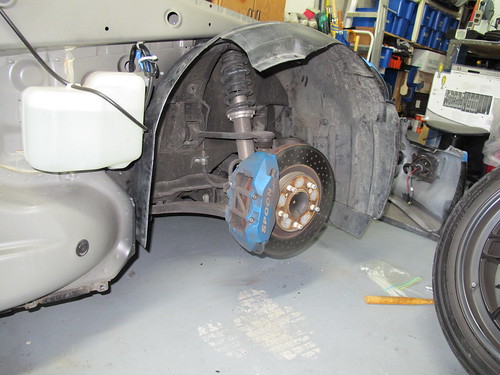
Trimmed fender liner on...looks good (...spoon calipers, spoon rotors, etc etc):
Ap2 bumper + diffuser for comparison:
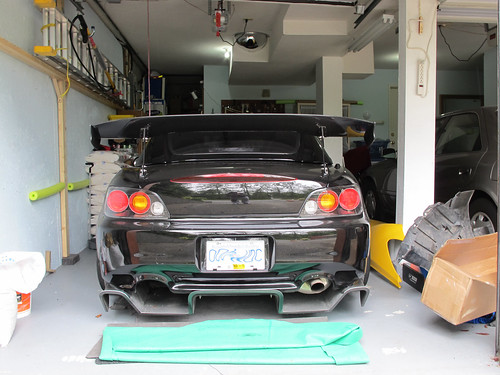
Slapped on the Ap1 bumper, sanded, repaired, prepped for paint and made custom mounts for my spoon diffuser.
*if you didn't know, the Ap2 bumper sit lowers compared to the Ap1 bumper. The bottom middle metal brackets needs to be cut and re-weld if you want to attach an Ap1 bumper properly. Read this on s2ki DIY
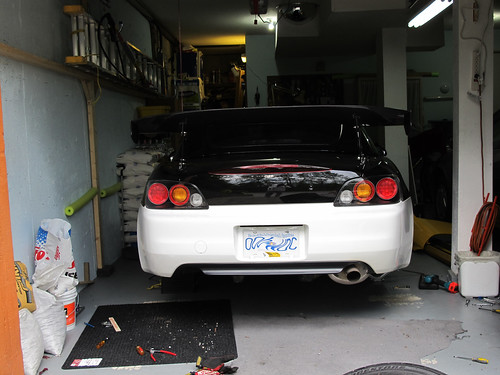
*I personally like both Ap1 and Ap2 bumpers. I switched to Ap1 bumper for the single exhaust cap and how it sits higher up. I have a really steep driveway and my car scrapes everytime I go in and out so the Ap1 bumper helped a lot.
After countless man hours repairing and prepping body panels for paint, I got bored.
A few days went by and all my parts were done at the bodyshop. I bought 3M scotchguard material (clear bra), watched youtube videos and applied it to the back side of my fenders. Overall the install went smoothly, the 3M stuff is very user friendly.
Installed one fender (this kind of shows my clearance issues on my driveway):
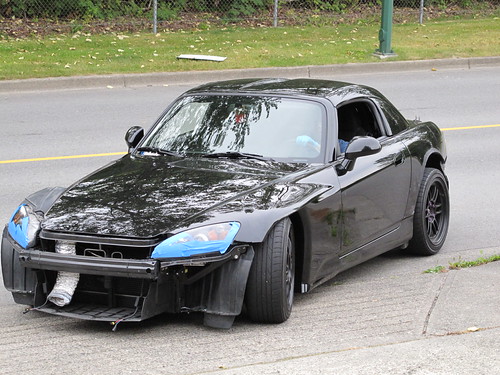
Old picture but this shows my awesome clearance on the driveway...it gets a lot worst as you go down. I'll take a video how I go down sometime. All my friends get a laugh out of it:

Initially I wanted to mold the over fenders into the 1/4 panel. I was already over budget for this project so I had to opt out of that "clean look" and decided to purchase some rubber trimming and paint the riv nuts black.
I bought this at the local Toyota dealer for $20. It's for the fender flares of a Toyota Tacoma.
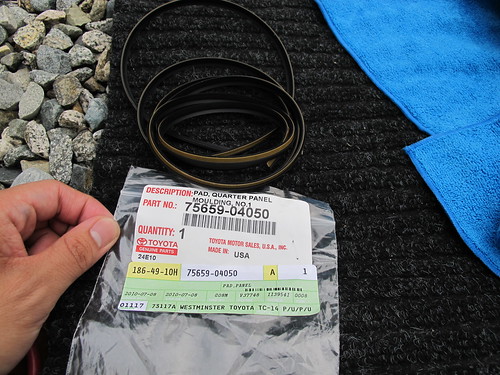
This is what the seal looks like...also installing custom J's Racing sides
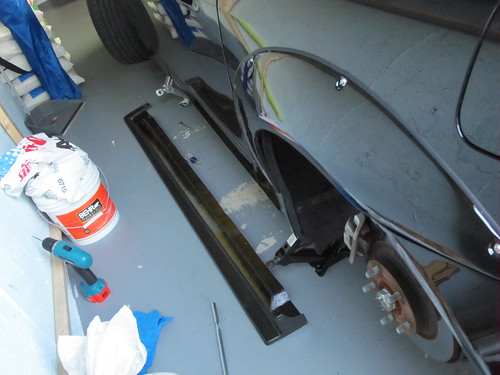
I will post some photos I took of everything on Post #2. I hope to repair my damaged bumper and paint it soon. I really need the extensions installed to finish her off.
Thanks for looking and here is my flickr if you want to see anymore photos.
http://www.flickr.co...os/vinz86/sets/
Vince
Here is an update of old thread: https://www.s2ki.com/forums/index.php?showt...&#entry18334327
A lot has changed and things didn't go as I wanted it to go, I'm really happy with the results though.
Shout outs to people that have helped me with my annoying questions...kim, brian, nick, jackie, vancouver s2ki - bbm group, john, charles, colin, berlina black drivers, speed syndicate...everyone that I missed.
Some notes:
1.) Time to save up for a winter project. Should I boost or buy new wheels?
2.) I was not budgeting for this as I wanted to work on my motor. I had to cut down costs by learning and doing a lot by myself. It was one hell of experience!
3.) I still haven't fixed my bumper (ripped it off on a local track, clipping the apex), ran out of time and budget...next month
4.) I need to get this car back on the track...the wide fender project took away from track my budget. I'm excited to try wider tires!
5.) I still need to re-mount my spoiler back, but I don't have time to re-paint and fill the holes right now. Next month?
After months of collecting parts, I finally got everything together. The best way for me to save money is to repair damage parts and prep all body work. All I did was pay for paint (since I don't know how to paint!)
Spoon Fenders
J's Racing Sides
New OEM Fender Liners...cut and trimmed
Overfenders
Extensions (never used)
AP1 Bumper...possibly single exhaust cap down the road?

My first tasks were to cut the 1/4 panels (all the photos during this are on my buddies camera...sorry). This was done at a local shop, Speed Syndicate, as I don't have all the tools. Curtis/Alex you the man!
Mask off
Cut outer
Flare up inner
Hammer, hammer, hammer
Tack weld inner + outer
Seam sealed
Coat...coat...coat
Riv-nut


My second task was to repair all broken parts or do all fibreglass work. It was a learning process for me so I had to start small. This was my first attempt.
Sanded
Grinded
Pre-cut fibresheets
Mixed resin + catalyst
*crossed fingers*
Broken Parts:

Me, hard at work:

Repaired:

*err should've taken final photos where I sanded down the fender, body filler and shaped. I guess I got "in the zone"...
Next on my list was to remove all body parts and install new ones:
Front bumper off
Rear bumper off
Fender liners off
Fenders off
Modify Ap1 bumper to fit
Add new fender liners
Cool shot:

Car parts everywhere:

Comparison of OEM fender liner vs trimmed fender liner for Spoon Fenders:

Trimmed fender liner on...looks good (...spoon calipers, spoon rotors, etc etc):

Ap2 bumper + diffuser for comparison:

Slapped on the Ap1 bumper, sanded, repaired, prepped for paint and made custom mounts for my spoon diffuser.
*if you didn't know, the Ap2 bumper sit lowers compared to the Ap1 bumper. The bottom middle metal brackets needs to be cut and re-weld if you want to attach an Ap1 bumper properly. Read this on s2ki DIY

*I personally like both Ap1 and Ap2 bumpers. I switched to Ap1 bumper for the single exhaust cap and how it sits higher up. I have a really steep driveway and my car scrapes everytime I go in and out so the Ap1 bumper helped a lot.
After countless man hours repairing and prepping body panels for paint, I got bored.


A few days went by and all my parts were done at the bodyshop. I bought 3M scotchguard material (clear bra), watched youtube videos and applied it to the back side of my fenders. Overall the install went smoothly, the 3M stuff is very user friendly.
Installed one fender (this kind of shows my clearance issues on my driveway):

Old picture but this shows my awesome clearance on the driveway...it gets a lot worst as you go down. I'll take a video how I go down sometime. All my friends get a laugh out of it:

Initially I wanted to mold the over fenders into the 1/4 panel. I was already over budget for this project so I had to opt out of that "clean look" and decided to purchase some rubber trimming and paint the riv nuts black.
I bought this at the local Toyota dealer for $20. It's for the fender flares of a Toyota Tacoma.

This is what the seal looks like...also installing custom J's Racing sides

I will post some photos I took of everything on Post #2. I hope to repair my damaged bumper and paint it soon. I really need the extensions installed to finish her off.
Thanks for looking and here is my flickr if you want to see anymore photos.
http://www.flickr.co...os/vinz86/sets/
Vince
#2
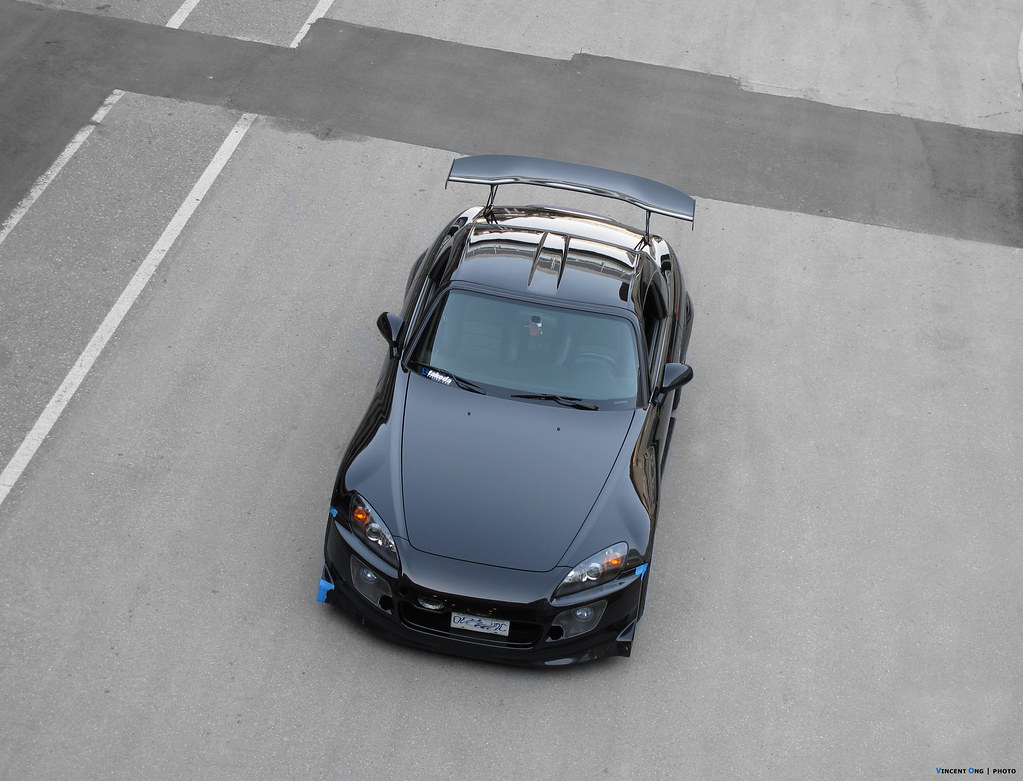
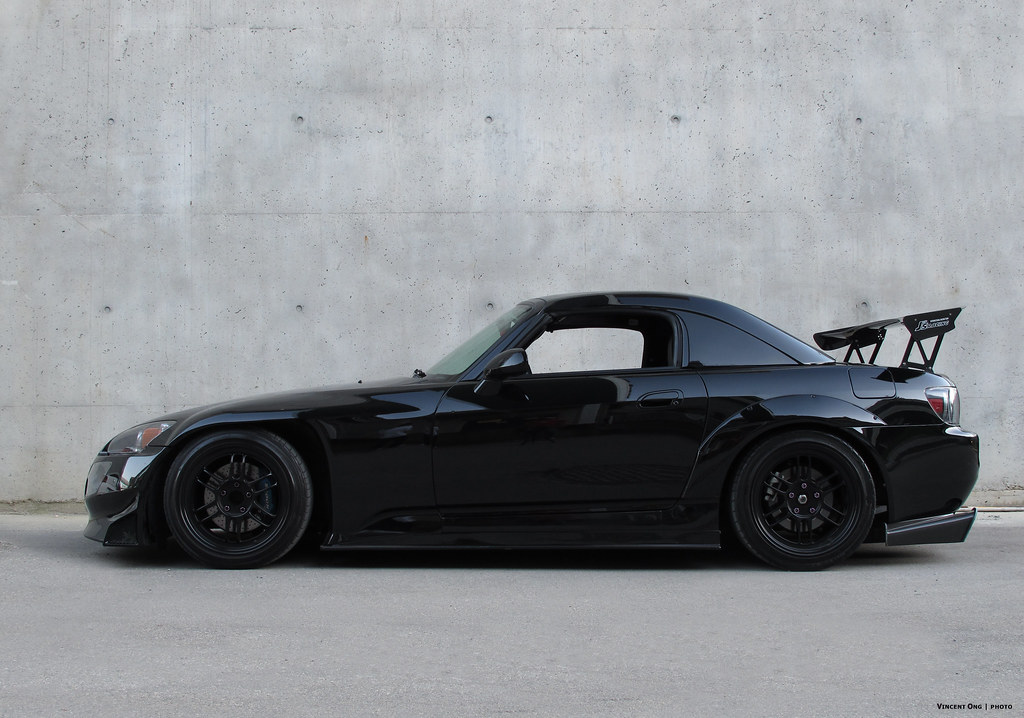
Here are some photos I took with all the parts installed. Clearly I need new wheels to fill in the gaps.
I'm leaning toward building my motor and using spacers for the time being. I won't be tracking this year so I should be fine.
I'm loving the new ass (a single exhaust cap would clean it up nicely)
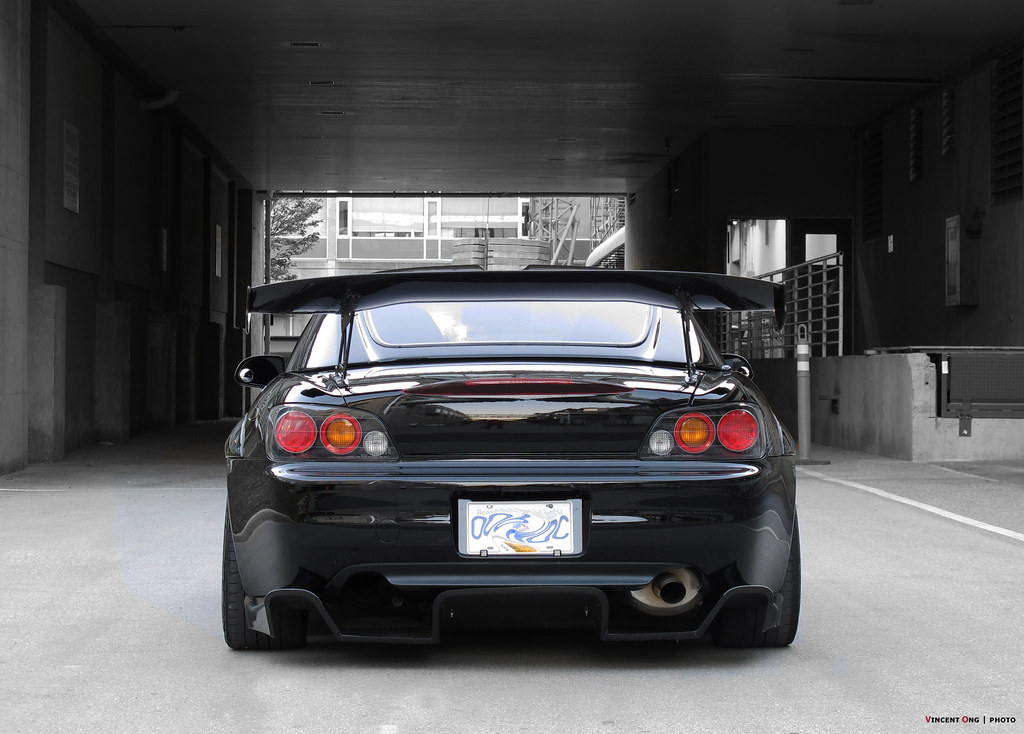
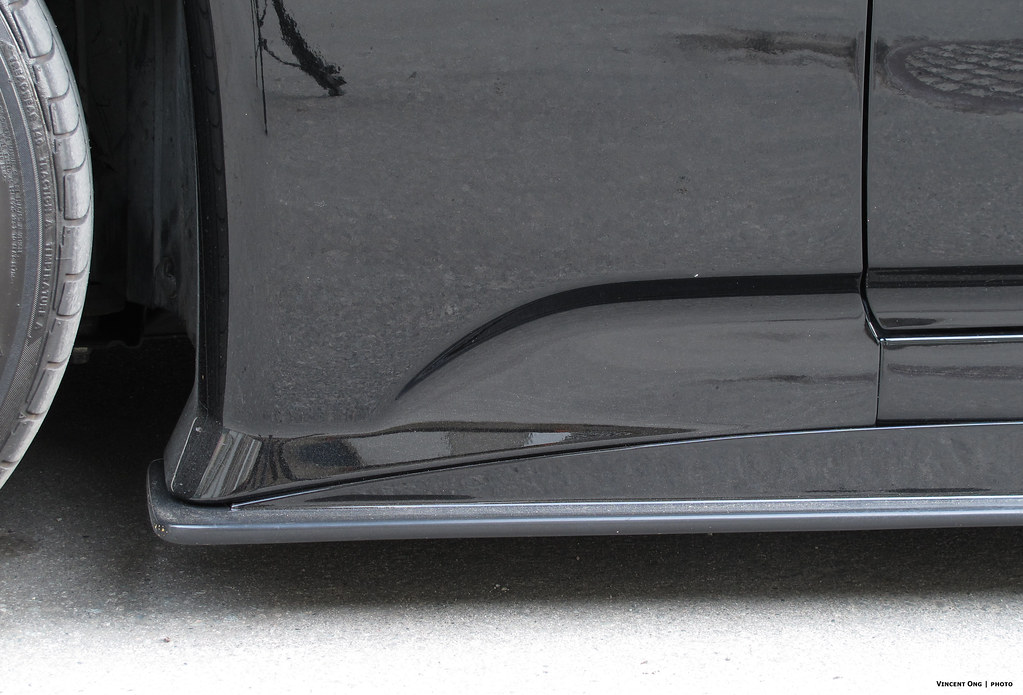
J's Racing sides, cut and fit for fenders
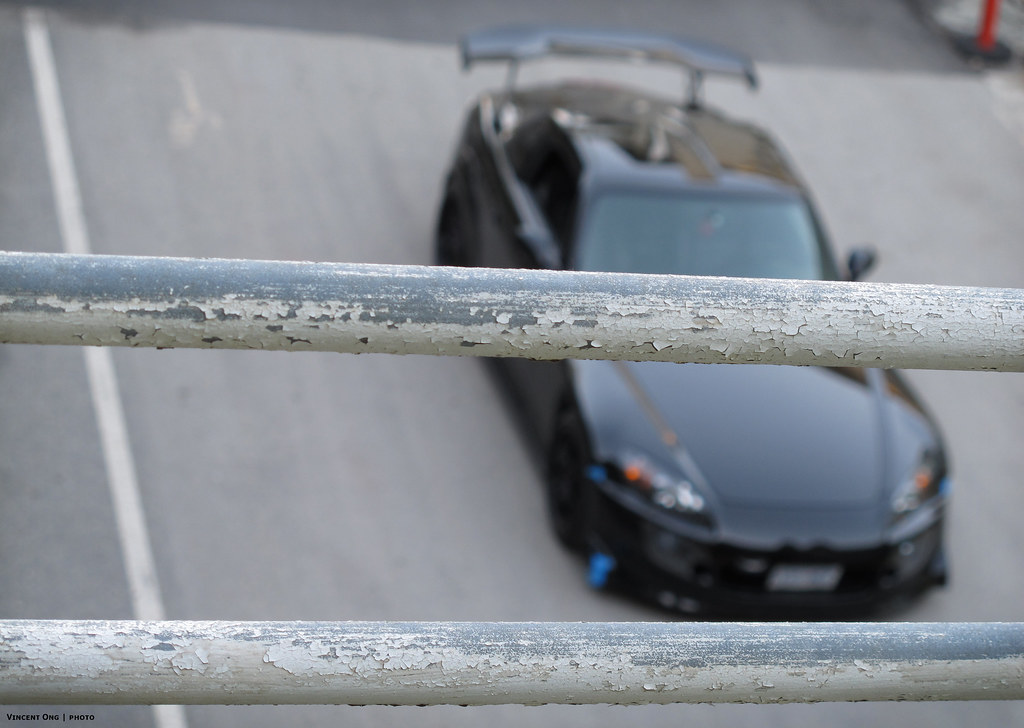
This was a cool shot
Lastly
Thanks for looking,
Vince
I'm leaning toward building my motor and using spacers for the time being. I won't be tracking this year so I should be fine.
I'm loving the new ass (a single exhaust cap would clean it up nicely)


J's Racing sides, cut and fit for fenders

This was a cool shot

Lastly

Thanks for looking,
Vince
The following users liked this post:
o'malley_808 (04-01-2019)


